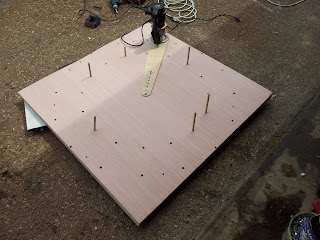
The first thing to do was make sure all the panels were lined up correctly. This was pretty easy to do. Using some alignment marks I had made (like THE JOINTS GO HERE) I was able to get them stacked in the correct orientation. I then ran short dowels through a few of the pin holes to make sure everything lined up. The only panel that gave me trouble was a panel I had created for the upper approach. I had laid it aside from the rest way back when and never marked it. I had to spin the panel a couple of times, but I got those holes to line up with the rest. The holes were aligned so well that the pins can fall straight through all five panels at once...
 |
| "I then ran short dowels through a few of the pin holes" |
 |
| "I fastened them all together in a stack with drywall screws" |
 |
| "I used the bolt as the pivot ...and set it for the outside cut" |
In my helix I had trouble laying the track in a perfect circle. The track developed "flat spots" where the curve radius got impossibly tight and caused derailments on my steamers. To overcome this I routed circular slots about one ply deep in the plywood panels. Each slot was a different radius that corresponded to the track radius. The slot served as a guide, but also helped hold the track to the desired curve. If you can lay track in a perfect circle, you don't need to go through the trouble.
Anyway...With a router, it's best if you cut in multiple passes. This makes it less likely that the router bit will burn up or break. I cut two panels, removed the scrap and then adjusted the router bit for a deeper cut. I repeated the process three times, until I cut all the panels. I left the inner cut to the last step so I could keep using the pivot in the center...
 |
| "I repeated the process three times, until I cut all the panels" |
 |
| "The base and the upper approach...are identical in appearance" |
Another modification to the general design was the upper approach. Originally this was visualized as a semi-circle that connected to the roadbed at Tunnel Hill. I opted for a full circle this go around that will replace some of the roadbed. That way I can take advantage of the helix pins to support part of the roadbed and scenery at the top of The Hill.
 |
| "full circle...that will replace some of the roadbed" |
Moving back to the peninsula I laid out a 4' x 4' sheet of 1/2" extruded styrofoam. I spread some glue on the bottom of the base and laid it down over the foam. Like all the roadbed on the All East, the plywood sits atop the foam. I placed eight heavy weights on the base and let the glue cure overnight.
 |
| "heavy weights on the base...let...glue cure overnight" |
Regards,
Frank Musick
Chief Cook and Bottle Washer
 |
| Allegheny Eastern Railroad |

No comments:
Post a Comment