A - The iron must be hot. Don't be afraid to leave it plugged in a while. It won't catch on fire, just make sure you unplug it after your finished for that work session.
B - Use plenty of flux. Liquid is best because it will flow into the nooks and crannies. I use solid flux that I melt but only because I have a pile of it lying around.
C - Keep the iron clean. Some use a damp sponge. I use a cheap brass brush.
D - Use the right size tip. I use a wide tip to heat up a large area quickly...By wide I mean 1/8" or so. Wide enough to heat up a rail joiner and rail. The fine tips are for things like electronics (IE decoder installations)
E - Use the thinnest solder you can find. I've seen guys using tiny chunks of thicker solder to make switches. I'd rather use the fine stuff.
F - Keep the tip sharp. This one seems optional. I use a light file on the tip on occasion, but only enough to reveal bright metal.
So much for soldering 101, now back to our irregularly scheduled program...
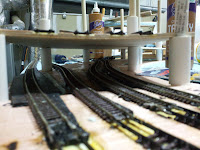
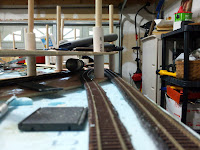
I undid the mockup of the Harrowgate area and started construction. This meant joining the code 55 approach tracks to the code 80 helix tracks. I mentioned before that I use foam "ramps" to gently transition from the helix to the base. I then use another set of these ramps to transition to layout. Because I'm doing this freehand I test fit a section of flex track so I can see where the track should go and how the curves should flow. Once I have a good idea what I'm doing I glue down the foam ballast strip, extending it all the way up onto the helix to the code 80. I trim it to fit in the track slots and wait while the glue sets. While that is happening I spread glue on the bottom of the code 55 flex track. I carefully snake it under the helix and around the support posts...
 |
| Approach Viewed From Helix |
 |
| Approach Viewed From Harrowgate |
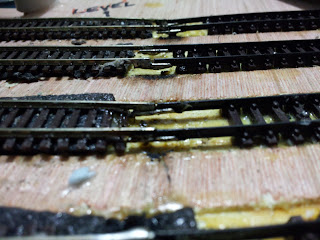
At this point it's time to join the approach rails to the helix. The rail height of the code 80 on bare plywood is the same as the code 55 with ballast strip. I install the joiners on the code 80 in the normal fashion. I apply liquid flux to the rail joiner and tin the upper faces of the entire joiner. I then tin the bottoms of the code 55 rails. I lay the code 55 rail on top of the rail joiners and apply the iron while holding the rail with needle nose pliers. Once the solder "freezes" I let go. If the joint doesn't hold I just reheat it. I don't usually have to add more solder.
 |
| Solder Joints at the Helix Lower Approach. |
I'm sure there are ways to run the approach tracks ahead of time, but you would have to know exactly where everything needs to be. Not me, I must like to wing it and hope the solution comes to me when I need it. I hope, however, that I remember the solution for next time.
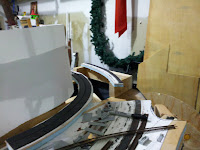
In between approach tracks I began engineering the Harrowgate area. I need to know the horizontal separation between the upper level track at Tunnel Hill and the westbound mains on the lower level. To do this I got some heavy paper and pinned it into place vertically, creating a kind of temporary backdrop. The paper is pinned directly to the road bed at Tunnel Hill...
 |
| Paper Pinned to Roadbed For... |
 |
| ...Westbound Tracks at Tunnel Hill |
With the paper in place I can see how much room is available in the Harrowgate area...
 |
| Harrowgate Viewed From BQ |
 |
| Harrowgate Viewed Towards Helix |
There appears to be at least 2", maybe more inside the westbound mains. Armed with this info I can begin planning the new sections of roadbed I'll need to make. I can also begin laying out the area around EF and the flyover above the passenger mains.
Over the next few days I'll be working in both directions. The next level of the helix will be installed and the rails connected. I'll lay out the new roadbeds at Tunnel Hill and Harrowgate. While I'll be using the plywood/foam roadbed at Harrowgate, I intend to use styrosplines for the new roadbed at Tunnel Hill and the flyover at EF. We'll see how that works out.
Regards,
Frank Musick
Chief Cook and Bottle Washer
 |
| Allegheny Eastern Railroad |

No comments:
Post a Comment