Wednesday, October 30, 2013

An Extinct 80 Foot Shark

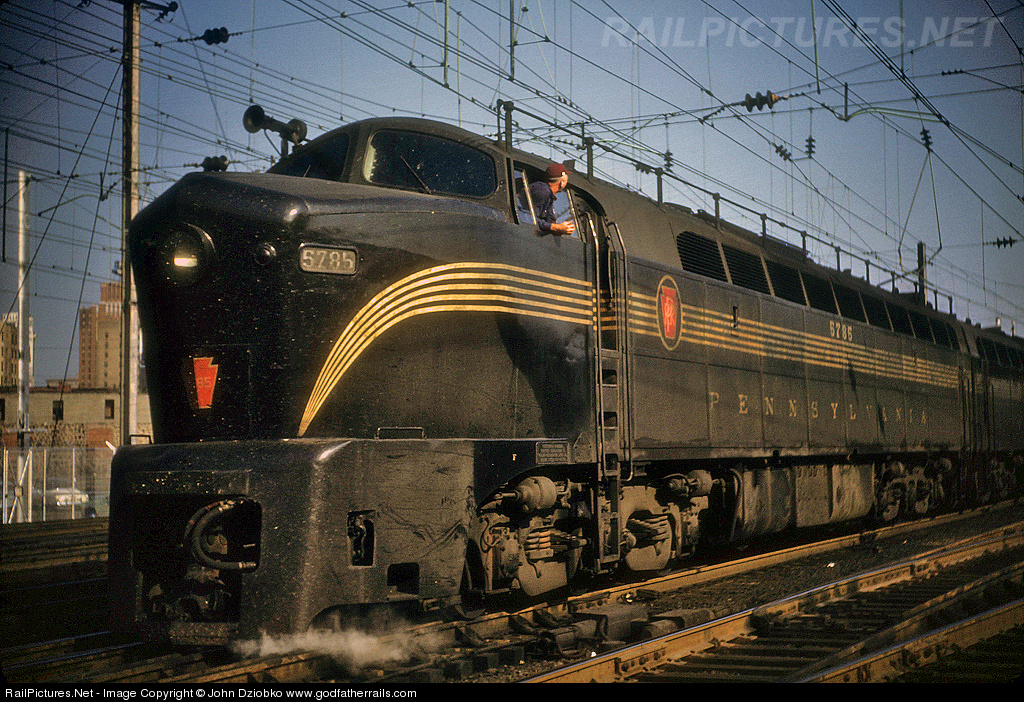
If you say "K4s" to a railfan, especially an older one, they will invariably think Pennsylvania Railroad. The K4s Pacific (4-6-2) is as much a symbol of the Pennsy as the keystone itself. If by some remote chance the topic turned from steam to diesel you might ask "Is there a diesel that shouts Pennsylvania". The railfan might pause a bit, but I'd bet the next words from their mouth would be "Passsenger shark" or "BP20"...
PRR Class BP20 "Shark"

A BP20 is to the PRR as a DD35 or a Veranda Turbine is to the Union Pacific. Nobody else had one. They were a unique design with a unique look and a nose shared by the T1 duplex steamer and Baldwins DR-4-4-15/RF16 freight diesels. Over 80' long coupler to coupler they were about ten feet or so shorter than another Baldwin giant, the BP-60 "centipede". Like the centipede they were meant for fast passenger service. There weren't many of each, by Pennsy standards, but back in the late 1940's they were part of the parade around Horseshoe Curve. They should be on the diesel roster of the Allegheny Eastern.

The BP20 is specific to the Pennsylvania and I don't think it has never been mass produced in any scale other than O. Most of the models I have seen are brass. There are a few kitbashes here and there and a resin replica in 1:160 . Apparently created by splicing RF16 models together it was not to scale and very unpopular with Pennsy modelers...
Ken-Ray Shark Shell

I can't afford brass models, especially at EBay prices. I haven't been fortunate enough to find a body shell on the same site. Even if I did, it was made to fit a PA mechanism, which is much too short. My only path to obtaining a BP20 model is to create one myself. I took a shot at it and so far I'm pretty happy with the results...
BP20 vs DL109

I based it on the Life-Like model of the Alco DL109, another odd diesel design. While the DL109 is not as long as a the passenger shark it's close, give or take a foot or so. The real shark has a wheelbase just over 46' - 3" bolster to bolster. The DL109 model scales about 43'. It's not correct, but it is long. Long enough for me.

I have to confess that I followed earlier modelers footsteps by cutting up V-Line and ER body shells. I took a bit more care in that I made the shell 80 scale feet long. The other cause for complaint was using the freight sharks cab and nose. The ER and the V-Line models have the short nose of the RF16. The BP20 had a rather drawn out profile. To replicate this I used bits and pieces of the shells I had to stretch out the freight nose...
Bits and Pieces

I used the DL109 mechanism with only a minor modification. The shark has recessed cab doors. I ground away just enough of the frame to clear these. I used a rotary cutting blade rather than an actual grindstone. It works much faster...


Modified Chassis
Once I modified the frame the shell fit snugly enough to stay put right where it should...
Snug Fit
None of the details on either shell match the real locomotive so I cut them off with a chisel blade. I then filled in any gouges or gaps in the body with putty. I did a preliminary sanding and then brushed on some "brunswick green". The paint helps bring out any faults in the finish. I can eliminate these with a second sanding (I hope)..

Preliminary Paint

Here's the passenger shark in progress compared to its freight counterpart...
PRR BP20 vs BF16

None of my drawings show a specific dimension for that long nose so I "guesstimated". It's definitely longer. I may have gone overboard. Still it looks pretty good to me. Hopefully it will look better when I get the sanding done. Once I get it right I'll have to make another A unit and a B unit. Back in the 1940's The Pennsy management required 6000 HP for every passenger train. That meant that, except for the two unit centipede, all of the passenger diesels were three unit sets. At the time each set was considered one locomotive. This led to those odd classifications for these sets like BP3, AP3, EP3 and FP3.  Unfortunately, these classifications won't work as soon as you buy the latest from EMD. An E7 set and an E8 set would both have the same classification. By that time, however, the management had realized that diesels (except those Baldwins) can be mixed and matched on an individual basis and classed each unit accordingly.

So far I've accumulated 6000 HP sets of other diesels assigned to passenger service. The Baldwin products are the only one's missing. At least they were till now...
Baldwin, EMD, Alco and Fairbanks-Morse

Regards,
Frank Musick
Shop Foreman
Allegheny Eastern Railroad


Monday, October 28, 2013

Various & Sundry

In our last episode the test train stalled on The Slide. There were only two units at the business end and it just wasn't enough. Despite that, the Baldwins seemed to have no trouble with the 2% grade on the rest of The Hill. But it was time to get a third shark out of the shop and back on the road. That train was still stalled. Took a bit of doin' but I used the parts from two to make one servicable B unit. The three sharks were able to pull the train the rest of the way to Gallitzin...
Shark Trio Makes Gallitzin

Once the train was back in Juniata I decided to try the L1s on the point. I don't think I've ever run this particular engine with a long train. Thirty four cars is bit more than any of the locomotives on the roster will have to handle in typical operations. A train that long won't fit on the yard tracks. Still, it would be nice to know what each engines capability might be. Short story; the 2-8-2 picked up the train and ran with it. It pulled past SLOPE and got to McGarvey's Curve before it started spinning it's drivers. It crawled a little further and then stopped with the rods a blur. I'm pretty sure two of these can easily handle a typical 15 - 20 car train all the way to Gallitzin.

Most of the time spent in the last few days has been reorganizing the garage and adding shelves under layout for more storage. I included a few for all the stuff that the workbench was buried under...
Space For Everything
 Yes, that is a Badger air brush and compressor. I have one, but I prefer hand painting my models.

All this mucking about freed up the "shops" so they could actually do what they're supposed to do, model railroading...
Juniata Shops
Juniata Shops Under The Lights


Of course this meant that now I could take stock, as it were, of all the stuff on the RIP track and the "auxiliary" RIP track at the west end of the yard...
RIP Track
Auxiliary RIP Track


It's not as bad as it looks. Most of the work is missing wheels or trucks. Those bolster pins drop out and Voila! off to the RIP track. Most of the time was spent organizing all the goodies I've been keeping in boxes for God knows how long. You would not believe the number of low profile metal wheel sets I have. Same with knuckle couplers, most of them MT products. I was able to make repairs and clear a lot of space...
Gettin'er Done.
I've also been going over the trackwork prior to mocking up the scenery. I'm trying to make any necessary adjustments before I move onto the that project (for once). For some of the adjustments I had to make yet another tool, Thing XX...
Level Track?
Thing XX Says "NO"


The tool lets me see what track needs to be leveled. This will be especially handy.. on curves where tracks are superelevated.

More to come...Oh yeah, I forgot...


Regards
Frank Musick
Shop Superintendent
Allegheny Eastern Railroad


Saturday, October 26, 2013

Another One Bites The Dust

I finished realigning the track at ANTIS. The interlocking isn't there yet. That's a whole 'nother project. For now it's just four parallel tracks...
ANTIS

The split between freight and passenger mains has moved closer to East Altoona. The curves on the mains need a bit of work. Not exactly "sweepers"...
East Altoona

Once I had the track down I had to run a test train. The L1s ran a while with that short train but it kept stopping in places. I don't think it's the track in those locations, other locomotives don't have the same issue. I'm going to use a meter to check.

I decided to run a real train. I gathered everything in the yards that had knuckle couplers and in running condition and coupled the sharks at the headend. There was some sort of problem and when I went to fix it I managed to push the B unit off the track. It plunged but the top of the workbench broke its fall about a foot below the railhead. Lost both couplers so I had to toss it into the RIP box. So I ran the train with just the two A units...

It was pretty amazing to me. The two units pulled a scale half mile of train up the 2% grade towards Bennington. When they hit The Slide, with it's 3% grade, they slowed but kept going. Moving at a crawl they almost made it the the summit before "running out of smoke". If the B unit hadn't gone deep six the train would have made Gallitzin. I'll have to get the shop crews on that unit SAP.

Regards
Frank Musick
Executive Fumble Fingers
Allegheny Eastern Railroad


Friday, October 25, 2013

Kiss HOMER Goodbye

If Juniata is to double as a staging yard then I need some way to route trains in both directions from both ends of the yard. At the west end ALTO serves this purpose. At the east end, however, there is no interlocking. In an effort to add an interesting scenic feature and eliminate a number of turnouts I chose to model the flyover at HOMER...
HOMER

Now that trains are running the arrangement at HOMER presents a few problems. There's the 2% grade in both directions. It spreads the mainlines apart causing them to rob space from the Blair Furnace area. Overhead clearances are tight, I had to replace the foam overpass with plywood to get a thinner cross section. Even then I had to raise the structure to make room for an L1s to pass underneath. This resulted in a slightly steeper grade, so on and so forth.

The end result is that I decided to eliminate HOMER and go back to the ANTIS interlocking instead. Thanks to the styrospline I was able to make the change quickly and cleanly. First I removed some of the track. Then I removed the overpass and the anchors that hold the spline to the benchwork...
Removing Anchor Screws at HOMER
I had to separate some sections of the spline so I could realign the tracks but for the most part I simply cut the spline and slid it to the new position...
Rerouting Track 1 and 4
I did have to create a new section of spline to fill in the gap left by the overpass. Because this section is straight I did not have to stagger the joints like I might on a curve. There was also enough overlap with adjacent sections to ensure a solid glue joint...
New Section of Spline
In less that an hour I had the roadbed realigned...
Rerouting Tracks 2 and 3

I have to realign the eastern end of the Juniata bypass to match the new spline position. Once the glue sets I can relay the track...
ANTIS
This change will provide greater flexibility moving in and out of Juniata and allow the yard to function as staging if desired...
ANTIS Reborn

It does make things a tad harder for a single operator but that can be dealt with in several ways. Lenz makes DCC accessories that allow the control of several turnouts at once, essentially creating an interlock. I'm visulizing an operating scheme for a single operation that utilizes automation for the through trains. I've learned that the Atlas/Lenz system I use is compatible with JMRI a computer program written exclusively for model railroading. Still working on the details.

Scenic interest out, operating interest in.

Regards
Frank Musick
Chief Engineer and Section Hand
Allegheny Eastern Railroad


Wednesday, October 23, 2013

Almost Instant Tractive Effort

I have written a few times over the last year or so about traction "aids". On locomotives like the sharks, which normally run as a set, this hasn't ever been an issue. On locomotives that may run individually, this is a real problem. Case in point; my L1s 2-8-2. This is a fine running model and despite my best efforts, still looks pretty good too. It can pull a typical All East train of 20 cars on level track. Unfortunately the Allegheny Eastern is not flat. The ruling grade westbound is about 2%. With the helix out of commission, it can be 3% if a train uses one of the eastbound mains. The L1s cannot get 10 cars up that 2%, let alone 3%. What to do?

I could throw on a set of traction tires, but that requires purchasing the mythical traction tire drivers from Kato. I say mythical because they are never in stock, at least they aren't when I check. Not much help coming from Kato.

Then there is the magical product "Bullfrog Snot". It appears to work, and I have actually held a bottle in my hand. It is available, but at a price. A whopping $25 will get you an ounce. With apologies to the folks at Frogs, Frills and Daffodils, I don't think I'll fork over my hard earned cash so easily. $25 for an ounce of anything makes me think of my youth and controlled substances from Mexico. Didn't spend it then, not gonna do it now.

Hope is not lost. A company called Performix makes a product called Plasti Dip, known as AggTrac here at the Juniata shops...
Plasti Dip / AggTrac

It's much like Bullfrog Snot, but with a less colorful name. It comes in colors, including that green that reminds me of Shrek sneezing. But...does it work?

How about we find out. I attached the L1s to the same train the sharks pull up the 3% Slide and made a "before"  video...

The locomotive does quite well from Spruce Creek all the way to Brickyard. At SLOPE, the start of the 2% grade it begins to feel the weight of the train. It manages to make it a little further, finally stalling trying to get the freight through Wikes Curve. Admittedly, the train is more than a handful for a single engine, but I've done the same test with half as many cars. Almost the same results. Can't climb the hill. I don't mind putting a helper on a long train, but ten cars does not a long train make.

This is where the AggTrac comes in. When I first tried Plasti Dip I bought it in a 11 ounce can for about $8. Like "Snot" you put some on the end of a toothpick, knife tip or some other small applicator and run the engine as you put it on...This time I purchased the Plasti Dip as a spray for about the same price. To apply it I masked off the bottom of the locomotive with packaging tape...
Masking the Driver Prior to Spraying
I ran the engine to get the drivers spinning and sprayed on the Plasti Dip on the rear set....

Rear Drivers

Probably went on a tad heavy, but it came out OK...

Applied AggTrac

I went out to the garage to shoot an after video and the battery in my trusty phone went dead. So I grabbed a real camera and was able to get this before the batteries died in that too...


Wish it was longer and showed the entire climb, but you may get the idea. Remember I said the L1s could not pull 10 cars up a 2% grade? It stalled at the bottom of The Hill, not even making it through Wikes Curve. This "after" video shows the locomotive pulling 10 cars up The Slide, the 3% downhill grade on the eastbound tracks at Bennington.

So now I'm pretty sure that two of these modified steamers can pull a standard 20 car train up the east slope. This is great, since the main operating scheme is helpers working uphill to Gallitzin. Very few trains will climb The Hill on their own. Didn't happen in the real world and it won't happen in the miniature.

Now if only I can repair the other L1s so I can double head them.

Regards,
Frank Musick
Superintendent of Motive Power
Allegheny Eastern Railroad

Monday, October 21, 2013

Bits and Pieces

Having trouble finding traction tires. Need one for my Trix Decapod. Without it the locomotive kinda bops it way down the track. All the local hobby shops only carry HO size. Don't want to wait a week for an online purchase to show up. Hmmm...What do I have laying around? Had some goop for coating tool handles, kinda like Bullfrog Snot but WAY cheaper. Liquid tape might work. Now that I know it needs to be stirred up I tried that electric glue. I succeeded in gluing the wheels to the brake detail. When I did free them up the coating was rough and caused wheel wobble. A lot of wheel wobble. Have to work out the kinks in this process...

Wait a minute...what about heat shrink tubing. If I had the right size I could...Ahh here it is. Not sure what diameter, there's only two or so inches and no labeling. Still it looks like it could work...

Heat Shrink Tubing Remnant
So I cut off a sliver, making sure it was relatively square and finagled it onto the driver. Then I hit it with a blast from my heat gun to send it home...
Shrink Tube Traction: Right Engine, Right Rear Driver

Traction's fixed. Now all I have to do is balance the weight OVER the drivers. On locomotives that don't have slots for traction tires (most of them) I'm going to use what I "AggTrac" but what the producers call PlastiDip. It comes in colors, including clear. I used to have a video of how it improved traction on an L1s. It was impressive. I'll have to make another video.

I also experimented with superelevation again. Last time I used stripwood and it was too thick. The elevation was so "super" that when an I1s stalled on the curve it flopped over. This time I used plastic strip. I went with .010 at first but it didn't make much difference. .020 provided just the right effect...
Superelevation: Forge Curve
I place the plastic strip after the track is nailed down by pushing it under the tiestrip until it's directly beneath the outer rail. Transitions are created by moving the strip toward the outside ends of the ties...
Superelevation: Transition

I'll finish up with a railfan video. Excuse the crude cinematography and the goofy music. I tried to add titles and locations, but that's a long story...


Regards
Frank Musick
Chief Cook and Bottle Washer
Allegheny Eastern Railroad

Saturday, October 19, 2013

Hauling Fool

Let's see. Tried a lot of things today. Some worked. Some sorta worked. Some bombed. Isn't that life as we know it?

I had mentioned earlier that "Wire Glue" doesn't seem to work. User error. As James Bond might say, it must be "stirred not shaken". I should have stirred the stuff before I used it. All the good stuff had settled to the bottom of the jar. Once stirred well, it works...
"Stirred, Not Shaken"

Not only does it stick, it's hard to remove. Lot's of applications for conductive glue. I'm gonna try it again on a decoder installation. I'll let you know.

I think I mentioned the new traffic pattern on the layout. I've been running test trains back and forth checking for derailments and any other nasties that lurk along the right of way. I usually mark the issue with a Sharpie right on the side of the roadbed where it happened.

After trying several single locomotives on the test train I pulled out my "secret weapon". A diesel the book "Diesels of Eddystone" called "Hauling Fool". I have a set of ER Baldwin "sharks" that are phenomenal performers. I found that I could haul a twenty car train up any grade on the mainline, including the 3% or so of The Slide with three of these beasts on the headend...


I usually run them as a quartet, but one of the B units is ailing. Not sure of the maximum they'll take up The Hill as twenty cars is the average length of a train on the All East. The length is restricted by the capacity of the yard tracks. Thirty would be the absolute max.

The sharks are able to pull a train at a constant speed whether going uphill or down. They are "the bar" that I would like to raise all my motive power to, steam and diesel. I'm working on it.

Regards,
Frank Musick
Chief Cook and Bottle Washer
Allegheny Eastern Railroad


Friday, October 18, 2013

Teething Woes

Well, it's been a long five years. I believe I started the first incarnation of the Allegheny Eastern in the fall of 2008, probably September or October...
Allegheny Eastern: October 2008
The original idea was a multi-level layout along one side of the garage With a short peninsula for the helix to get to the higher level(s). There were a few drawbacks so I decided to correct them. It was the beginning of the "organic" design process that led to the present layout...

So it's an anniversary of sorts. With the exception of the helix, the mainline on the All East is complete enough to run trains. It seems like it took an eternity to create the fifteen by fifteen "storage system" that now fills our two car garage...
Allegheny Eastern: October 2013

The loops that replace the helix are now in place and trains are running. Well, A train is running. I put together a short freight and proceeded to test the trackwork. Seems fine. Unlike the helix there were only a couple of places that needed adjustment and those were easily dealt with. The only major issue is the pulling power of the locomotives. My L1s was the first locomotive I tested and it would stall while hauling a ten car train up The Hill. It also had trouble making it over the top at HOMER. To make things worse, the loops have changed the entire traffic pattern and trains now have to go UP The Slide at Bennington. This short stretch is meant for downhill traffic only and the grade must be close to 3%.

I took the L1s to the workbench (the kitchen table) to deal with the traction problem. In its place I attached a FM H-16-66...
Test Train Idling On The Westbound Main at Juniata


The little diesel was able to pull the train better, but still had trouble climbing The Slide. Once again it was a traction issue. Still working on it, trying a rather unique (read oddball) solution.

The other thing I was able to discern by running the test train was the new traffic pattern. The "four" mainlines are now just one long track that passes itself four times. The test train ends up running all the tracks, covering roughly about four hundred feet. This complicates operations quite a bit. The entire layout is now controlled by only one analog throttle. Hands off running of multiple trains is a tad impossible at this point. Even using DCC the layout would require multiple operators. A double edged sword in that multiple operators is a good thing, but the operators (IE grandkids) aren't always here. There is also the question of kids operating trains. They tend to have that "crashes are cool" mentality. Horrifying thought. Definitely need safety nets and/or scenery to keep trains from taking The Plunge.

I'll let you know if my traction solution works. I should know sometime today.

Regards,
Frank Musick
Chief Cook and Bottle Washer
Allegheny Eastern Railroad


Tuesday, October 15, 2013

Things To Do While Glue Dries

Now that operating trains is perhaps moments away (I wish) it's probably a good time to make sure the trains actually operate. While the glue on the upper loop is drying I pulled some tools off my workbench (which is actually labeled "Juniata Shops") and went to work on some locomotives. AI wanted to make corrections to the paint on all of the steam engines. Several of them (read "most") need modifications to run on code 55 track. First off I needed to go over the two L1s Mikados and take the parts from the "leaper" to fix the one with the melted truck. I made some corrections to the paint and had to tune the mechanism to make sure it wasn't binding...
Surviving L1s

In the course of looking over the other locomotives I found that the modified I1s I purchased (forget where) had more than just it's steam pipes lined up. Apparently the previous owner used a commercially available kit when they made the changes. The modified parts look like they were machined. There were also additional parts added including a weight with holes drilled to hold the modified boiler. The boiler wasn't just pushed back to line up with the pipes, it was also shortened by cutting out a section towards the middle...
Modified Trix I1s

As you might find in the image above I also found that if you over tighten the boiler mounting screw it causes the boiler to arch up at the smokebox and makes the model look rather peculiar. Loosen it a bit and it goes back to normal. About the only things not done to the Trix Decapod were a decoder and grinding the wheel flanges for code 55 track.

Having seen how this 2-10-0 was changed I took my other I1s and made similar changes. Not having the aforementioned kit, I wasn't able to make all the mods, but I did correct the bolier and grind down the driver flanges. I also replaced all the tender and pilot truck wheels with ones having a lower profile flange. In the image below the modified flanges are on the lower locomotive...

I1s Wheel Modifications
It took a while to grind down the drivers. Having learned the hard way what happens if you rush it, I took my time. I ran the engine while touching a Dremel grinding tool to each flange. I went one at a time in short passes with the wheels and the Dremel turning in opposite directions. I would stop and visually check them and try the locomotive on the code 55 track on the layout. I just kept doing this whole routine a little at a time until the drivers seemed to be clearing the spike heads on the track. They probably don't look much smaller but they are working. I plan to do the same thing to the other 2-10-0 and the rest of the Trix models.

I opened up one of my Trix K4s and found someone had tried to install a decoder. The red and black wires that should go to track connections were soldered to the motor brushes. The gray and orange wire that should have gone to the motor brushes didn't go anywhere. They were also cut too short to be useful. If I reuse the decoder I'll have to replace them or extend them....


Decoder Fail

There are two K4s models and both will get the flange reduction treatment. I'm ordering tender trucks from Bachmann so I can improve electrical pickup on all the units. I'm also planning on equipping some of the steamers with the post war cast pilot (Yes I do like it better than the horizontal slats) from PRR-Parts

I'm hoping to get the L1s that swan dived back in running order. Still looking for the trailing truck that flew off. I have a new cab for the thing. I messed up the first one when I superglued my fingers to the sides. Pewter is VERY soft and removing my fingers warped the castings badly.

Having the GHQ kit on the L1s reflects bad on the other steamers with Trix shells. I'm thinking of modifying the cabs to look more like a PRR cab should. If that doesn't work I may buy more cab kits from Republic Locomotive Works.

I'm going to install decoders once I get the fleet in shape mechanically. There's plenty of room in the tender. A lot of folks don't like seeing all those wires running to the locomotive. Doesn't bother me. The benefits of DCC far outweigh the appearance issues.

That's it for today.

Regards,
Frank Musick
Chief Cook and Bottle Washer
Allegheny Eastern Railroad