There is a W.C. Fields quote above my desk, "If a t first you don't succeed, try, try, try again. Then give up. There's no use in being a damn fool about it.".
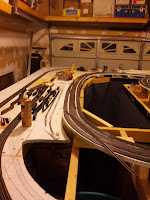
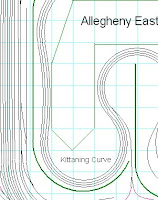
I'm not at the giving up stage yet. While the work on the helix proceeds (slowly but surely) I've been working on new projects and redoing others. On the layout, I'm redoing the eastern approach to Kittanning Curve...
I cut out the area in question and I'm figuring out how to reverse that curve. I can't just flip the roadbed. The location and/or radius of the curves at either end will need to be changed.
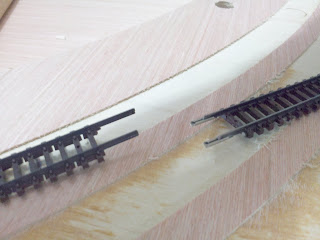
While working on the helix I found that soldering the track into long straight sections before curving it doesn't work for me. At least it doesn't inside the helix. The "sliding" rail moves so far that I have to cut way too many ties out. This results in a large gap in the tie strip leaving the rails unsupported and possibly out of guage. Instead I started leaving the very end of the preceding track section loose so I could attach the next section as a tangent. After soldering the rail joints I can curve the track without the joint and joiner on the inside rail moving too far out of place...
 |
| "Tangent" Joint |
It's a bit slower, but I'm getting better results.
Some of the code 80 flex track is older Rapido which is chemically blackened. I find I have to file the rail to expose the nickel silver to make a good solder joint.
 |
| Clean The Ends of Rapido Flex Track |
Among the side projects is a model of a one of a kind N5e cabin car...
 |
| PRR Class N5e Cabin Car |
Didn't work out to well...
 |
| N Scale N5e |
| Bachmann "Northeast" Caboose |
I went ahead with the brass parts from the kit. Unfortunately I don't see the "frankensteiness" of the models until I look at the photos. My eyes can no longer see that well. Yuck, what a mess! I took it back to the workbench (kitchen table) and took it apart. After removing the paint and such, I decided I was better off redoing the thing from scratch. The Bachmann caboose is still a good candidate, but I'm trying to build up the N5e from sheet styrene.
I also went back over two locomotives I wasn't happy about. Both the R2 and the L1s I was working on last week just weren't right. On the R2, I took it apart and tried to refine it. I filled in more joints and shaved off more details. I went over the tender and tried smoothing the joints...
 |
| Reworked R2 |
 |
| Coast to Coast Tender |
I'm not sure I'm happy with either one yet, but I'm getting there.
I also took the L1s I had assembled and cleaned and filled all the holes before repainting it. Still haven't added any details. Getting it running will require a lot of handling and those fine details won't survive...
 |
| Reworked L1s |
I keep trying. I just hope I have the sense to know when to quit.
Regards,
Frank Musick
Chief Cook and Bottle Washer
 |
| Allegheny Eastern Railroad |


No comments:
Post a Comment