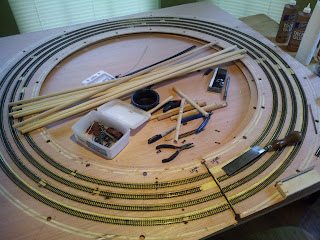
Cost of building (if you only build it once)
3 sheets of 1/4" hardwood plywood at $12 ea $35.91
3 10' lengths of 1/2" Schedule 40 PVC pipe at $1.86 ea. $5.58
8 1/2" dia dowels, 36" long at $0.99 ea $7.92
Total expenditure $49.41
I didn't include the flex track. I got almost all of the code 80 I used at $1 per 30" section. At real prices this would be the most expensive part of the build. I believe I used close to 55 sections to build all four tracks (about 134 feet of track). That's almost $280 at $5 each.
So for the helix parts I spent roughly what it would have cost me just to buy the threaded rod and nuts on a more conventional helix.
With all the levels ready to go, the first thing to do is create the support pins. I cut the 8 36" dowels into 32 9" pieces...
 |
| Base and Levels and Pins Stacked Prior to Assembly |
 |
| Thing 2.0 in 2.0a Configuration 9" Cut |
I then use a westernized version of the Japanese razor saw to cut the dowels into 9" pieces...
 |
| Pile of 9" Pins |
 |
| Supports Spaced Every 7" |
With all the pins cut to size I start assembling the first level. All the spacers on the upper levels are 2" high. Between the base and the first level each set of spacers has to be cut to individual sizes in 1/8" increments.. 1/8", 1/4". 3/8" etc up to 2". I didn't use any special formula to decide what size to make each one. I just divided 2" by 16 and came up with 1/8". Every spacer should be 1/8" taller than the one before it...
 |
| First Level Spacer Sizes |
With the pins and Level 1 in place things look like it's going together well...
 |
| Pins and Level 1 in Place |
I added the 2" spacers that support Level 2 and lowered it onto the pins. So far so good. Level 2 fits without issues...
 |
| Level 2 Installed |
The real test comes with Level 3. On the previous version of the helix, the holes did not line up well. As a result I had to "persuade" pins to fit. The application of brute force worked to some extent. I only broke some of the pins. This time, however, the holes lined up perfectly. I was able to install Level 3 with little to no problems...
 |
| Level 3 Installed |
Regards,
Frank Musick
Chief Cook and Bottle Washer
 |
| Allegheny Eastern Railroad |

No comments:
Post a Comment