Friday, November 13, 2015

Slow as Molasses in February

Still working on the bridges through Quotidian. Two are almost done with a third waiting for assembly...
Quotidian Bridges

I went with a more realistic design (you can see the original "Web" bridge at center right) for the three bridges. The two are shown here will soon be carrying the branch across the siding and mainline. The third will be located at the other end of the viaduct. I'm thinking I may have to reallign the roadbed to make them all fit.

Did some speed tests on the two diesels I've been tinkering with. I mentioned previously that I had purchased two Canon motors. The first went into the Hustler. I decided to use the second one in the SW1. I made some videos of the tests. First the SW1 (please excuse the noise)...
SW1 Slow Speed Test

The locomotive ran pretty well with the stock motor after I eliminated the traction tires. The new motor enhansed the performance even more. I think I clocked the engine at just under 9 mph.

The Hustler is a whole 'nother story. Between the new motor and the Travis drive performance is unbelievable. In this video the locomotive is running the 3 foot section of mainline along the rear side of the layout. The video is in real time...
Hustler Slow Speed Test

It now takes over a minute for the little locomotive to travel 36"  Using a scale speed converter on the web I found that's the equivalent of 2.3 mph. Light years beyond the performance of the stock Hustler. The Travis drive is almost silent, which in a way helped me test a turnout. The only time I can hear the locomotive is when it traverses the turnout. It makes a double clunk sound as it passes through the frog. The turnout is slated for replacement. I'm getting better and fabricating them.

Regards,
Frank Musick

Tuesday, November 10, 2015

Widgets and Doodlebugs

Still multi-tasking. One of many advantages of retirement is being able to spend as much time as I want on things you want to do. Very few, if any, people have a monopoly on my time. You can get a lot done on a model railroad when you have 8 or so hours a day to spend on it.

Anyway...The Canon motors arrived. Right away I had to play around with one. I had to modify the widget to suit the motor, but not too much. The performance was quite a change. So much so that I did some other tweaks on the Hustler chassis. Made sure the pulley was square to the shaft, that sort of thing....
Canon Powered "Widget"

How much of an improvement was this new motor? See for yourself...
Travis Drive Hustler 


It runs slow enough. It can run even slower than shown in the video. That's great, but can it work for a living?
Here's the little guy pushing a string of ore cars...
Hustler at Work


Still working on the boxcab shell for the wee beastie. When it's done it will be assigned to hauling ore cars back and forth on the branch.

In other news, Quotidian now has passenger service...
Gas Electric

I got this Bachmann doodlebug off EBay at a reasonable price. It was pretty noisy when it first ran, but settled down after a few loops around the layout. Lighting could be better, it tends to flicker. Themajor problem with it is the beautiful Baltimore & Ohio paint job. I don't want to repaint it. Fortunately, the B&O is one of the railroads I like to model.

Another video, this one of the gas electric...
Baltimore & Ohio Gas Electric


The quality of these videos sucks. I've used my phone to take previous videos with good results. Not so good on these.

Now that the glue has dried on the trusses i can actually build the bridge. Staged it with the camelback...
Web Truss Bridge

Apparently the freelance design of the truss actually works. If not then the only thing holding up the locomotive are two 1/8" x 1/8" basswood stringers...
Tight Fit

If you've been reading this and you remember the basic idea of the layout, Quotidian was a small town with a couple of industries. I hadn't really planned on modeling any real engine facities. Then I found this beauty on EBay...
Revell Engine House

Needs a bit of work, but it was cheap and best of all it's one of those Revell models from back in the day. I've always liked the buildings in the series, with the possible exception of the water tank. Back on the day I would have loved to have a few of these on my layout. They are well detailed and look great. A lot of modelers use them in kitbashes, but this one won't. I gonna make the missing parts, paint it an weather it. Hopefully one day this scene will be a respectable vignette...
Steamers and a Brick Enginehouse


Regards,
Frank Musick

Monday, November 9, 2015

Multi-tasking

Over the last few days I've had a lot of time to spend on model railroading. It's cold and rainy here so indoors is the place to be. I've also been multitasking, jumping to another project while waiting for paint or glue to dry. I think I have three or four going right now.

While waiting on the Canon motors I started on the boxcab body for the Hustler. It's being fabricated from plastic. I'm going slow. Don't want to rush and create something for the trash can...
Boxcab Hustler

Still got a ways to go. So I jumped over to the viaduct and bridges for Quotidian. I assembled the viaduct parts I already cut out. While the glue dried I started on the trusses for the bridges....
Bridge Trusses

I didn't follow any particular prototype for the truss. The design is also freelance. I decided it's a Web truss, designed and built by the Web Truss Company. There was a real company with that name, and they made trusses. not necessarily for bridges, but trusses nontheless. I need three in all. They are going to be identical.

So now I waiting for the glue to dry on two projects. I move over to another task I've been working on for some time, making decals. I make the original in Microsoft Visio and print it out on transparency in an ink printer. To make the artwork really dark I run it through the printer two or three times. What I end up with is an 8" x 11.5" master for creating stencils...
Master Transparency
The gizmo in the image above is a 100 watt light clamped to a post. The light is for exposing a photo-emusion material called StencilPro. I lay the master over the sheet of StencilPro, turn on the light and wait 4 to 5 minutes. Once the exposure is done I develop the StencilPro by putting it in water for about 10 minutes. I then VERY carefully wash off the excess emulsion and let it dry exposed to the light. When all this is done you get this...
Silk Screen Stencil
It's essentially a screen made out of a high resolution weave of silk. You lay it over some clear decal paper and squeeze some ink over the screen. If all goes well you get a decal you can apply to the side of a railcar or anything else you need decals for. I chose to make a decal for a Gorre & Dephetid boxcar, you know, the ones you see on E-Bay for $40 or so...
Gorre & Dephetid Decal

Had to play with the gamma on the image a bit. Hopefully you can see it. It's still a work in progress. I don't have the development down cold yet.

I made up a bunch of masters, most for northeastern amthracite haulers. There is however one master for railroads that never existed except in minature. You might recognize a few...
Freelance Model Railroads

Some of these model railroads no longer exist. The builders are gone and the layout dismantled or in John Allen's case, destroyed. Two are layouts I've built or planned at one time. I want to create at least one car of each. It's one way to beat the rivet counters.

The glue on the viaduct dried so I positioned it on the layout. The roadbed was cut to make a place for it...
Assembled Viaduct

Not finished by a long shot. Still needs arch liners and stone paper among other things. Still, it will support a train even though the branch line isn't operating yet. It's more of a storage track at this point.

The final project I took on was painting and adding a sound decoder to the new 4-4-0 we found in Louisville. Like the other steamers it's made by Mehano in Slovenia and imported by IHC....
Mehano 4-4-0

 I used the same Digitrax SDH166D decoder on all three. It's affordable (less than $50) and comes with a speaker. I'd like a louder whistle, but other than that I'm fine with them.

Regards
Frank Musick

Sunday, November 8, 2015

Cheap Diesels

I have several locomotives that are diesels. They were very inexpensive. Two of them are Athearn "Hustlers" made in the 1950's-60's...
The Infamous Athearn Hustler

My Hustlers are painted exactly the same so they get called the twins. I bought them back when our twin daughters were little..
The Twins

Each girl pickes out a car to go with them. One picked out a tuscan Pennsy passenger car. The other chose a stainless New Haven coach. Obviously, the idea of a Hustler hauling a passenger train wouldn't cut it on the "pro" style layout. Kids...Who'd a thought they would ignore the sacred precepts of model railroading. Anyway, the two Hustlers run like all Hustlers. Their top end is about.400 MPH. The high torque motor coupled with a rubber band drive (what Athearn referred to as High F drive) is a major factor in this outlandish behavior

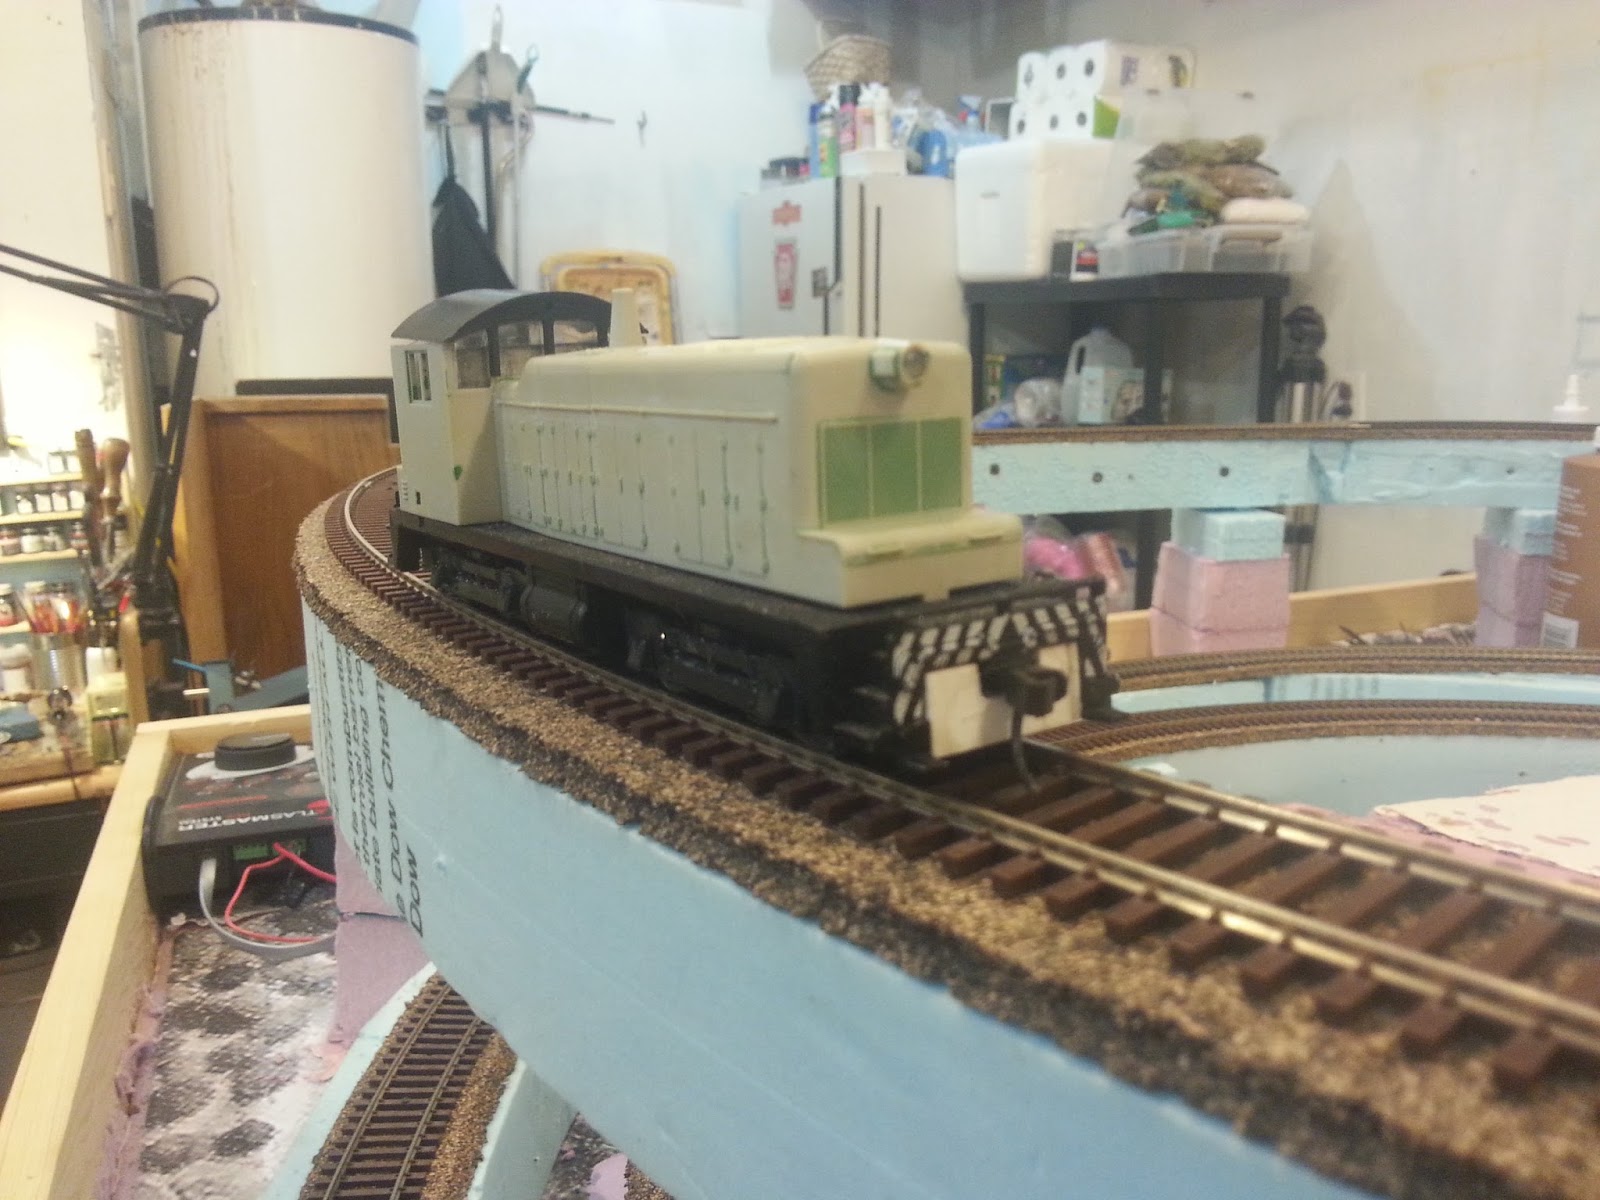
The other locomotive is an old AHM Electro Motive SW1. It sort of runs. The driven wheels have traction tires. That would be okay, but the wheels also have that groove for the tires. Makes it impossible to run without the tires. The SW1 wobbles down the track. It also runs too fast. Not 400 MPH, but still too fast for a switch engine...
AHM SW1


I found very little info on repowereing thes diesels. What I dfid find was disappointing. Apparently, other model rails think nothing of spending a rediculous amount of money on these little critters. The cheapest alternative was a out of production gear set by Ernst. I remember buying back in the day. Like everyone else I found them EXTREMELYdifficult to set up properly. That Hustler never ran. The other options were a Northwest Short Line PDT or SPUD or whatever. The one for the Hustler is out of production now, but it was way to expensive. The Hustler originally sold for $15. Spending close to $100 to get it running seems ridiculous...
North West Short Lline PDT


Fortunately for me I have hundreds of old Model Railroader and Railroad Model Craftsman magazines in my library. The March 1959 issue of Railroad Model Craftsman has an article called "Unhustling The Hustler" by Cliff Travis. Mr Travis and I think a lot alike in some ways. He's thrifty. In 1959 the Hustler was a new product. It was cheap and popular. Yet. as Mr Travis, states in the article, they were (and still are) crazy fast. Since the repowering kits didn't appear for another few years, Travis made one. Rather than resort to gears he kept the rubber band drive...
RMC March 1959 Page 18
RMC March 1959 Page 19

The Hustler comes out of the box with a 10 mm "axle" and a 1 mm or so drive shaft. Travis added a secondary shaft with a 7/16" diameter pulley, roughly 11 mm. I have no idea what that means in terms of ratio's but I do know that it works. I fabricated my own version of the "Travis Drive". I used readily available parts. The pulley came from a $5 science kit. I replaced the motor with a smaller motor from an N scale Mini-Trix locomotive. The rest of the drive is fashioned from plastic and a length of steel rod in my scrap box..
Widget
The Trix motor worked, but only just long enough to prove Mr. Travis was right. Before it became toast I made a video...


This is how a Hustler normally performs...
Hustler Hustling


As I mentioned above, the other diesel is an AHM SW1. The typical response to 'How do I repower this locomotive" is "Buy a Walthers SW1". Nice thought but said model costs about 80$ on EBay. We are being frugal here. For about $10 I was able to create a decent running locomotive. Not as nice or to scale as the Walthers, but definitlely more affordable. The conversion on this one was much simpler. First I got rid of the truck mount couplers by cutting the mounts off the trucks. I then filled in the ends and added knuckle couplers...
SW1 Modified End
I removed the wheels with the traction tire grooves and replaced them with "normal" wheel sets. You could just replace the grooved wheels with normal wheels. Just pop the old ones off the axle and press the new ones on. This took care of the wobble but the locomotive slipped. To combat that I used my version of "Bullfrog Snot" ($25 oer once). A can of Plasti-Dip is available at Lowes or Home Depot for about $8. Comes in spray can (used here) or quart can....
Plasti-Dip "Traction Aid"
Locomotive was masked off and the wheels were sprayed while turning...
Spray-on Traction Tires

Another video...This one of the Sw1 after the modifications...
Modified AHM SW1


The pulley drive on the Hustler needs some tweaking and something other than an N scale motor. I ordered two Canon motors off EBay. I'm also building a boxcab body for the little critter. I want to give it a kind of pre-'40s "oil electric" look. At one time Cary made a cast metal boxcab body for the Hustler, but they are pretty rare nowadays.

Regards,
Frank Musick

Monday, November 2, 2015

Andyrobertsite

Now that more track is in I thought I'd take a staged photo...Here a 4-4-0 with a mixed freight takes the siding as a 2-6-0 camelback rumbles by with another mixed consist. Meanwhile a 2-6-0 trundles across the viaduct with a short Andyrobertsite ore train...
Meet At Quotidian

No scenery yet and only one turnout, at the far end of the siding, is in place. A second turnout is waiting for installation at the near end of the layout. The second turnout turned out much better, which prompted me to start a repalcement for the first...
Layout

You can see the parts for the viaduct sitting on the branch line at the lower right.

The model viaduct is being built from 1/8" plywood, a material I don't think existed when John Allen built his linoleum version. These new thin plywoods are an awesome addition to hobby supplies. I think the thinnest is only 1/64". Not sure how you make plywood that thin. Anyway, while I originally thought of using plastic, plywood covered in embossed stone paper seemed a better way to go....
Viaduct "Kit"

I cut the arches with a hole saw (very slow and carefully) and a hobby saw. It took a while, but I didn't want to mess it up.

I positioned the parts on the layout to get a better idea where they will go...
Quotidian Viaduct
The two sections will be joine by wood truss bridges patterned after this one... 
Wooden "K" Truss Bridge

Another bridge will run from the left end of the viaduct to the "mountain". Haven't decided what type. I think Mr Allen used another truss bridge although I think I saw a picture with some other type. Thought of using this...
Wooden Pratt Truss
Right now I'm working on getting one of the Moguls. The gears are not engaging and I need to tweak the motor mount. Got to repower those twin Hustlers too.

Regards,
Frank Musick


Saturday, October 24, 2015

More Stuff

I had mentioned some of the treasures I found in Louisville. The hobby shop is called the Roundhouse. You have to see the place to believe it. Anyway...Some of the hoppers seem to be old Varney products. Things were so simple back then. The cars have the general appearance required to look like hoppers. Seperate brakewheels is the extent of the add-on details, much like Athearn and other manufacturers of that "era". One car has a "sort of" brakewheel cast in...
Cast On Brakewheel

The cars are also heavy. While it limits the length of the train a loco can handle this IS a good thing. They track very well through turnouts...

Cast Metal Frame

Most of the cars in general also have kadee couplers. METAL Kadee couplers from back in the day when cast alloy was the only way to go. The trucks are almost all sprung with those teeny springs that go flying at the first opportunity, never to be seen again. Fortunately this usually occurs at the workbench when you're trying to replace wheels... 
Sprung Trucks

All in all they look pretty good, go together fast and perform very well. Works for me.

I'm currently working on a set of Roundhouse ore cars. Three cars come in the kit. Although they are supposed to wood chip cars I left off the wooden extensions and kept them as steel ore haulers. They are short with metal frames and seperate plastic castings for the brake system components. The frames are solid, not open like they might be today on such cars. They are rugged and simple to assemble...
Roundhouse "Three In One" Ore Cars

I've wanted a short train of these little guys ever since I saw them in Gorre & Daphetid photos when I was a lad. That's about five decades ago.

Another EBay purchase was a real surprise. I ordered some embossed brick and stone papers. They are exquisite..
Embossed Paper

They came from a fellow named Dimitris Tastsidis way over in Thessaloniki, Greece. He has a store on EBay. The detail is amazing...
Detail

I'm hoping to use them to build structures. Brick paper is rather old school but these embossed sheets are light years away from the old stuff. They equal or surpass their plastic rivals. One place I can use the stone is the viaduct at Quotidian where the branch passes over the mainline...
Quotidian Viaduct

The colored stone will make great foundations for several buildings in the town, including an enginehouse I'm contemplating.

Regards
Frank Musick


Friday, October 23, 2015

A Few New Additions

A few things have happened since the last entry. Here's an update...

A second curved turnout was constructed for the other end of the siding. I did a much better job on this one. So good, in fact, that I'm going to build a replacement for the first turnout...
Right Hand Curved Turnout

I spent some time and care on the points and stock rails. I used the techniques I developed with the first turnout...
Points

Same with the frog. I think I can do better in this area. Had to do a lot of filing to make it right...
Frog

Although it worked well on the workbench the only way to know for sure is put it in place and run trains through it...
Future Location

Which brings us to the rolling stock and motive power. Found a hobby shop in Louisville that took me back a few decades. Athearn blue boxes were everywhere. Old school shake the box kits from Roundhouse, Varney and a bunch of others. Got a good deal on rolling stock...10 cars for $6 each. The roster tripled overnight. Most of the cars came with Kadee knuckle couplers. I've repainted them in preparation for adding my own decals (I hope)....
New Equipment
 Also snagged another IHC locomotive, a 4-4-0. Like the Mogul before it, it came lettered for the L&N... 
IHC 4-4-0

Just like the Mogul, it will get a new paint job. The 2-6-0 is now in plain black and decoder equipped. Same Digitrax mobile sound as the camelback...
2-6-0

The 2-6-0 came with an oil burning tender. I hacked up the bunker cover and made it a coal hauler. Also replaced the horn hook coupler with an EZ Mate knuckle.

Made progress on ttrack and ballast strip for the branch. At this point the layout looks like something is happening...
Layout: General View


Made a video of the two steamers to show how DCC works. Nothing spectacular, but you may get the idea...


Regards,
Frank Musick