Wednesday, January 16, 2013

The Other Guys

I'm thinking that many of us take the time to research the prototype and period we want to model. We look at what locomotives were used, what cars carried the freight and passengers, and what the towns and cities looked like. We consult old maps and photos to get an idea what things looked like. We look at the buildings, the trees, the rocks, even the cars and trucks in the streets. We even learn what stop signs and street lights were being used. Yet there is one area I know I haven't researched at all.

The trains that run on the Allegheny Eastern will, for the most part, be made up of cars marked for the All East. All these cars will bear the logo, name and car number on the side. Most bulk commodity shipments, like coal, will be shipped on trains where every car will bear the name of the home road. What about other trains that carry mixed freight or even passengers. There are usually cars present marked for other industries, even other railroads.

I think you may see where this is going...If I am modeling a railroad as it was (or might have been) in the year 1949, I  need to know what those other industries and railroads were doing in the same year. I would not run FP40's or intermodal cars marked Allegheny Eastern. Neither should I run a BNSF box car or a new Norfolk Southern coal hopper. These are extreme examples, of course, but you get the idea. I should find out what was running on the New York Central, Santa Fe, or Chicago & Illinois Midland in 1949.

I have several freight cars that I purchased because I liked them. There was no other reason. Most of them have paint schemes that struck my fancy. Others were gifts or included in lots that I bought of E-Bay or at a show. Here are some examples...

New York Central "Pacemaker"

The NYC offered overnight LCL (less then carload) service between New York City and Buffalo way back in 1935. It was interrupted by World War II and reintroduced in 1946 as Pacemaker. In 1948 the service was extended from Buffalo to Boston over the Boston & Albany, which was owned by the New York Central. A photo from 1946 shows a string of the specially painted cars behind a 4-8-4 Niagara.
1946 New York Central "Pacemaker" Consist
Unfortunately for me, the Pacemaker cars never left their home rails. It's doubtful that any of these cars would have shown up on Pennsy or any other property not controlled by New York Central. Each railroad had its own expedited merchandise service.  The cars for this service on the Pennsylvania were primarily X41b and X29b class painted "boxcar red" with silver and white striping. A white PRR circle/keystone logo on a red background was prominently displayed along with the words "Merchandise Service" on the sides...
PRR Merchandise Service Boxcar
Like the NYC the Pennsylvania kept its expediter fleet within it's own system. So it'd be OK to have an entire train of these cars on the mainline, but not the NYC or any other merchandise service. Cars assigned to All East Merchandise service would stay on the Allegheny Eastern providing overnight service between Philadelphia and Pittsburgh or perhaps Chicago. They would be painted for this specific purpose.
Allegheny Eastern "Expediter"
Then there are those McGinnis colored cars from the New Haven and Boston & Maine. Were they around around in the late 40's? The answer is no. Patrick McGinnis served as president of the New Haven from 1954 to 1956. He moved on to the Boston & Maine in 1956. McGinnis colors should not appear on the Allegheny Eastern.
New Haven Boxcar in "Mc Ginnis" Paint

The New York, Chicago & St Louis Railroad, commonly known as the Nickel Plate Road started using the High Speed Service livery on its caboose fleet in 1946. I'm not sure when the scheme was applied to boxcars, but for now I'll take it as the late 40's. This car would appear in All East mixed freights.

Nickle Plate "High Speed Service"

The other consideration is what "technology" was available at the time. Some commodities, like grain, were shipped in boxcars. These were standard cars with "dams" placed across the doorways to hold the grain in. I don't think these cars were ever completely full. The load could have fit in a gondola, but since it needed to be covered during transit they used a boxcar. Covered hoppers for grain transport weren't in use yet.
Loading Grain Into a Milwaukee Road Boxcar
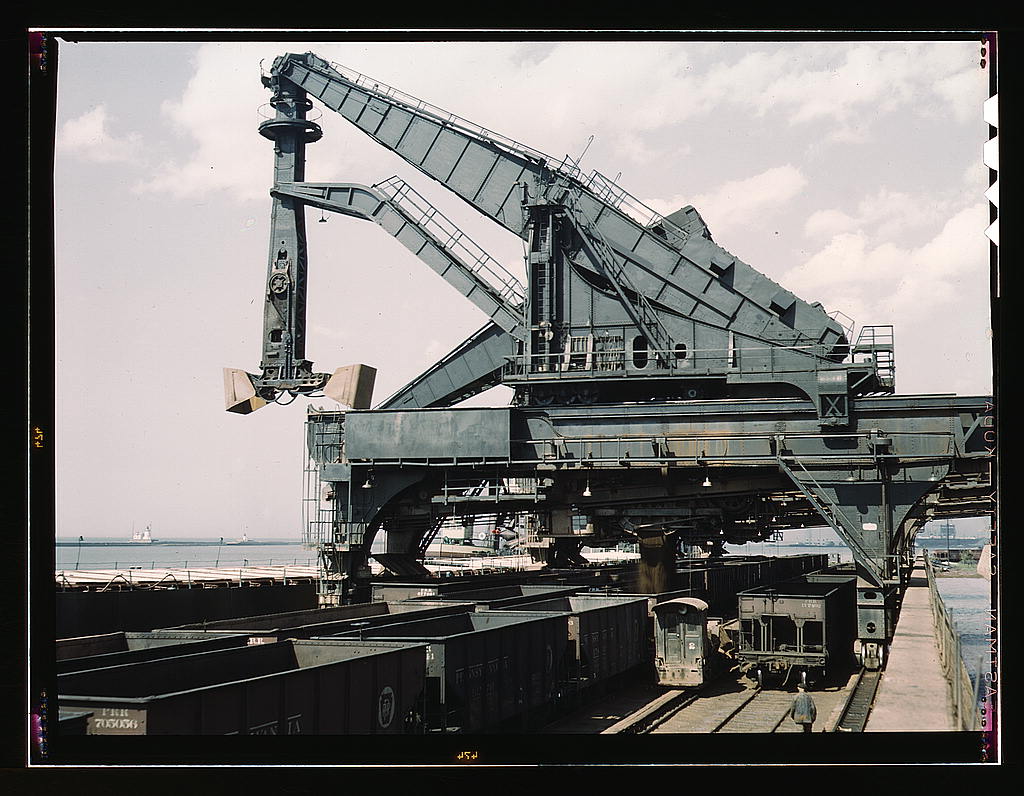
Another example would be iron ore. On the Pennsylvania this ore was shipped in open hoppers, usually 50 ton GLa class. Because the ore was so heavy, the load was piled in each end of the car over the trucks. These cars were never fully loaded. On the Pennsy, cars specifically designed for carrying ore did not appear until much later.
Hulett Machine filling PRR Hoppers in Cleveland
What about refrigerated cars for carrying produce and other perishables. Most of the reefers in 1949 still had ice bunkers. Powered refrigeration units were few in number. Icing stations were available at various points along the railroad to refresh the ice in the bunkers. Altoona was one of these places. Not only would reefers on the All East have roof hatches for the bunkers, there should be an ice house with sidings to service these cars.
Filling the Ice Bunker on a Reefer.
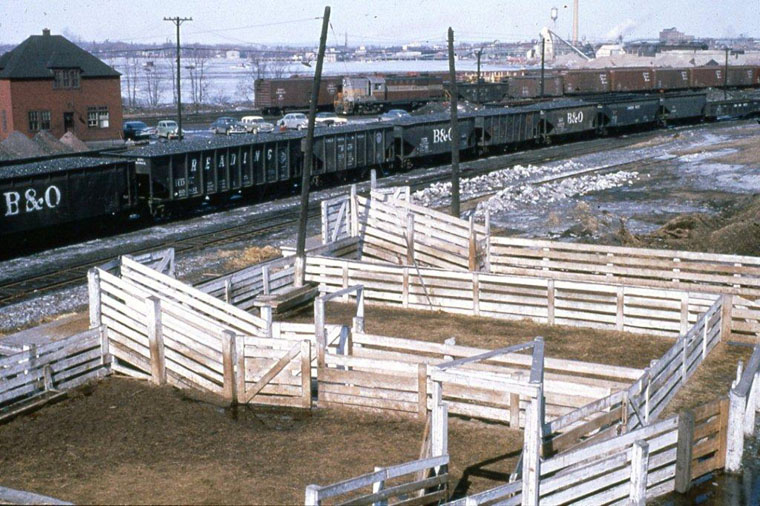
Stock cars would be handled in a similar fashion. Federal law dictated that live stock had to be unloaded at regular intervals. Many major yards had sidings with stock pens just for this purpose. Because of it's location I don't think Altoona had stock pens, but on a model railroad you want as many excuses for switching as you can get. The yard at Llyswen should have stock pen facilities.
Stock Pens
Foreign cars would also appear on a regular basis in passenger consists. Many railroads offered through service to cities they did not serve. It might have been possible to find Atlantic Coast Line or Seaboard cars mixed into PRR trains like the "Advance Florida Special" or the "Advance Silver Meteor".
Southern Pacific Sleeper "Glen Tarsan"

Let's not forget the ubiquitous Pullman cars. These cars came in a variety of colors, some of them reflecting the railroads that leased them.
Pullman Sleepers "Glen Pond" and "Glen Blair"
One final note...They were not "foreign" cars but the Pennsy had special heavyweight cars for shipping theater sets. These cars were named after plays, characters or authors like "Falstaff" or "Shakespeare".
PRR Class B70a Theatre Car "Shakespeare"
There were also heavyweight cars to ship race horses from one track to another, another excuse to use those stock pens.
PRR Class B74b Racehorse Car

I want to include some of these ideas into the trains on the Allegheny Eastern. It's one more way to create a convincing setting on my miniature rail empire.

Regards,
Frank Musick
Chief Cook & Bottle Washer
Allegheny Eastern Railroad


Friday, January 11, 2013

Laying Track

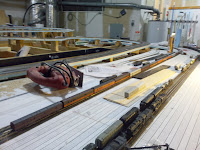
OK, so I got the routing done, I've test fit the parts, counted the sections of flex track I need, etc. Now's it time to actually lay some track. Before I do that though, I have to solder up a length BEFORE I curve it. I grab two lengths of code 80 off the pile and lay them down. There's twelve foot length of exposed bench work in front of Thorn that makes a perfect assembly area. First thing first, I plug the soldering iron in so it can get good and hot while I assemble the track. Then I start assembly. I put rail joiners on by slipping the entire "stick" of four joiners on the rails and then breaking off three. They break cleaner this way and I don't drop as many. Then I slide the rest of them onto the other rail and break off two, etc and so on...
Installing Rail Joiners
I connect the two sections together, making sure that the sliding rails are both on the same side. This side will face the center of the curve. I make sure the rails line up and there is no gap. I apply rosin with a micro brush  and make sure it covers the outside of the rail where it meets the joiner. 
Applying Rosin
Now it's time to place the iron against the  bottom of the rail joiner. If the iron's hot and the tip is clean the joint should heat up quick. Don't want to melt the ties. The rosin will smoke a little as it melts and flows down into the joiner. I run the solder along the top of the joiner against the rail. The solder should flow down into the joiner and leave a small bead. I take the iron away and the joint "freezes" as the solder cools. I don't have any photos of this because I'd need three hands to hold the solder, iron and snap a picture with my phone all at the same time. Suffice to say it works and I end up with a pretty clean joint. If it doesn't work I make sure the iron is clean, add more rosin and hit it again.
Soldered Joints
I keep adding sections till I have four (or five) lengths of flex track. I have to pick it up carefully (it gets a bit unwieldy) and move it over to the helix, laying it in a curve around the slot I using. When I do this the sliding rail will move.Even though ties have already been removed from around the joints as they were soldered, the joints on the inside rail will move and usually try to push more ties out of the way. I remove these so the joint can shift and keep forming the circle and removing ties as needed.
Applying Glue
With the track ready to be installed in the slot, I run a bead of tacky glue and use a brush to spread it along the bottom  I only need a thin coat of glue. Don't want it squirting up between the ties. The tacky glue gets, well, tacky in a few moments and will hold the track down while it sets. I move the flex track into the slot and  pin down one end while I work the rest of the length of track along the slot. I make sure the ties are tight against the outside wall of the slot.
Pin Down the End
Once I get the track laid around the panel I pin down the other end. This makes sure the track will stay in the slot while the glue sets. Since I laying the second track I check the spacing with a spacing gauge.
Spacing Gauge
The spacing is good since the slots were routed correctly. If the spacing was too close I would just move the tracks farther apart. Using a 1" bit for routing turned out to be a good thing. Hadn't thought I might need to make adjustments. The extra width allows me to do that.
Finished Level
The process gets repeated four times until all four tracks are in place. I leave the "weights" on the ends of the track and call it a day. Oh yeah...make sure I unplug the soldering iron. Don't want to burn the house down, I've gotten used to living indoors.

Only two levels to go.

Regards,
Frank Musick
Chief Cook & Bottle Washer
Allegheny Eastern Railroad

Thursday, January 10, 2013

Some Actual Work for Once

Going...
Going...


Gone!!!
The old helix (Mark III ?) was slowly disassembled so the track could be re-cycled. For the most part all I had to do was pull out the nails holding in place. Since the some the nails were a press fit in the plywood, this often took a bit of pulling with needle node pliers. There were a few places where the track had been glued in place in an attempt to fixx problems. Fortunately I used tacky glue. It holds very well, but doesn't harden like white glue. Stays flexible so it's easier to make changes. As the track was pulled up on each level, that level was removed to gain access to the next. Took a few hours but I got the track up almost intact.

With all the routing and drilling completed the next step was to assemble the new helix (Mark IV?). One of the issues with the old helix was shoddy layout. Many of the post holes did not line up vertically and as the levels went up the posts would be forced out of plumb. Some of them actually broke as I tried to force them in place. This time I was very careful with the layout stage and it payed off. Once I got all the panels oriented properly I assembled the base and the levels reusing some posts and 2" spacers from the old helix. With most of the posts in place I then test fitted a dowel in any open holes. Everything lined up perfectly
View Towards the Center
Test Fit

Once I was sure that everything would actually work I disassembled the entire thing and stacked the panels. I inserted posts in key locations to keep everything where it should be. I then clamped the panels together and cut the joints using a square and razor saw. Leaving the square corners on the outside created a tangent I could rest the base of the square against. It allowed me to make the cuts perpendicular to the tangent and vertically aligned.
Cutting Joints

With all the woodwork out of the way, it was time to start laying some track. First I laid out track in the slots I had routed in the plywood. I counted how many sections of code 80 flex track were needed to make a complete circle for each radius and noted it at the bottom of each channel.
Section Quantities
Now that I knew how many sections I needed for the curves I pulled the quantity I needed for the innermost track and got out the soldering iron. I connected the first two sections with rail joiners while the iron got good and hot. I brushed some rosin on the joiner making sure I coated the inside of the joiner and the outside of each rail. When the iron was ready I placed the tip under the joint and touched the thin solder I used between the rail and the joiner on the outside of each rail. If the iron is as hot as it should be the solder should just flow into the joint. If it didn't I would stop and make sure the tip of the iron was clean and added more rosin. I ended up with some nice looking joints. I only soldered the outside keeping the inner side clean for the wheel flanges. Some of the solder flows between the rail joiner and the bottom of the rail so it's still a pretty strong joint.
Clean Joint
When you use flex track it is always a good idea to check which rail slides when you curve the track. This sliding rail should always be toward the center of your curve. When you are soldering your track this step is IMPERATIVE! If you don't the track will actually buckle as you curve it. If you are soldering long lengths the track WILL get unwieldy and squirm like a snake. The rails WILL pull away from the ties and wreck the track. How do I know this? Because I soldered the first two sections the correct way. On the third section I unknowingly placed the sliding rail on the outside of the curve. I soldered the fourth section and then picked up the track and laid it out. It stretches pretty close to ten feet.
A Soldered Section of Track about 10 Feet Long
The problem showed up when I tried to fit the track into the slot. That misplaced rail let me know it was there in no uncertain terms. Several inches of rail sprung in two different directions and tore itself away from the tie strip. I had to break the joint and repair the track.
Broken Track
Once I got that fault corrected I laid the track into the innermost slot. The slot was originally routed with a 3/4" bit that would have produced a close fit and pretty much have held the track in place while the glue dried. Unfortunately the bit was a cheap one and it burned up. I had a better bit but it was 1". I used it anyway and rerouted all the slots with the new bit. There is no close fit now, but the curve radius is wider by an 1/8". I lay the track so it presses against the outer wall of the slot and use that to keep the track in a perfect circle while I glue it down. The press fit would have been ideal, but this works just as well at keeping the track in a true curve.
Track Laying Commences
Rather than lay the track on each level as I build up, this go around I'm laying the track on each level prior to assembly. The track is laid so that the rails extend past the joint. When two levels are joined the rails are trimmed to suit and joiners with feeder wires will be installed. This joint will not be soldered in order to allow the track to expand and contract with the temperature in the garage. It will also allow the helix to be disassembled should the need arise (I might move someday). The joints at the approach tracks will be handled the same way.

Better cut those square corners off at 45 degrees before I go any further...

Regards,
Frank Musick
Chief Cook and Bottle Washer
Allegheny Eastern Railroad

Wednesday, January 9, 2013

Freight Cars

One of the major considerations when developing a layout based on the Pennsylvania Railroad is the scope of the thing. The Pennsy was unlike any other railroad, with the possible exception of the New York Central. It was huge! At one time it was the world's largest public corporation with over 11,000 miles of track and 20,000 employees. 25% of the freight cars in use in America bore the PRR reporting mark. The railroad's cars, like its steam locomotives, often had features unique to the Pennsylvania. A prime example are the Pennsy's cabin cars (caboose in Pennlish). Although model manufacturers do it all the time, you can't just paint any caboose red and letter it for the Pennsylvania Railroad...
PRR Class N5c Cabin Car
PRR Class N5 Cabin Car


The only way to get these singular looking cars without scratch building is to bite the bullet and shell out the money. Since I won't be purchasing a hundred or so I can accept that. They usually go for about $25 each, but I have gotten them a tad cheaper through careful shopping.

The problem with building up the rest of my Pennsy freight car fleet the "correct" way is availability and cost. The models of PRR equipment that are on the market tend to be on the pricey side. While it might be OK to spend $15 on a few  Bowser hoppers, to me it's downright insane to buy these models in any great quantity. If you have a budget, you cannot afford a lengthy train of such models (unless you buy 'em over a number of years). The typical Allegheny Eastern coal drag is short by some standards, perhaps twenty - thirty cars. Such a train would cost anywhere between $300 to $450. This does not include the 4 diesel lash-up at the head end and the cabin at the rear. That's just one train!

On the All East there are at least two coal drags on the main at any one time. That's well over $1000 when you toss in the motive power and crummy (caboose in railroadish).  There needs to be some way to cut the cost. Fortunately there may be.

Many of the hoppers will be the shorter GL class and its variants. These cars are considered gondolas in the PRR classification system. Go figure. These are two bay cars with a capacity of 50 tons. I feel that these cars can be represented by "generic" 50 ton hoppers painted and lettered for the PRR. These other cars are often available on E-Bay and at train shows. Often you can buy a slew of them for what you might pay for one GLa model. The generic cars can also be used to model the H31 class with composite cars  being used as the H31a and H31b. If you add diagonal braces you can also represent the H31c

"Generic" 50 Ton Hopper
Bowser GLa 50 Ton Hopper


The class H21a hopper is quite different. These were 70 ton 4 bay cars. They were originally built with double door chutes. In the '30 and '40s they were rebuilt and the chutes became "saw tooth" single door. Still, they don't look like other 4 bay hoppers. Probably because of their original design the chutes face the "wrong" way when compared with others. It's easier to show than describe...
Bowser H21a 70 Ton Hpper

"Generic" 4 Bay Hopper


Most of the four bay hoppers currently on the layout look like the car on the right. To replicate the H21a chutes the bottom of each car would have to be cut up and the chutes reversed. Not quite sure how to do that yet.

I thought many of the hopper cars currently on the layout might be just downright wrong. There are a lot of three bay hoppers and I wasn't sure the Pennsy owned any. By studying the equipment diagrams at prr.railfan.net I found that the H37 and H39 classes were three bay 70 ton. While the cars I have may be 100 ton, I can live with that.

PRR Class H39 70 Ton Hopper

Current 3 Bay Hopper in the Fleet


Covered hoppers are pretty easy. For the most part bulk commodities like grain were hauled in boxcars in the 40's. Some materials, like carbon black used in manufacturing automobile tires, were shipped in this type of hopper. I have a couple and they are already lettered for carbon black service.

Pennsy boxcars are another type that can be rather unique. One in particular is the class X31 "wagon top" although the Baltimore & Ohio also had a version (even wagon top cabeese).  Models of these cars are produced by several companies, including Micro Trains. Once again, I'm only buying a few.so they fit in the budget. The PRR's "standard" boxcars were the X29 and its variations. Aside from the actual X29, many of the other X class variants resemble their contemporaries on other roads. The X25c can be represented by any other USRA single sheathed boxcar.

Many of the other classes can be modeled using similar generic cars. Flatcars, stockcars and reefers tend to look the same no matter who built them. The PRR had a unique looking steel stockcar but it did not appear till the 1950's. For the most part, if I lay aside any purist tendencies I can make reasonable facsimiles of Pennsy freight cars.

Why all the fussiness if I'm going to paint and letter everything for the All East? Simple, I want the Allegheny Eastern to reflect the Pennsylvania Railroad as much as possible. Keeping it freelance just allows me a little artistic license.

Regards,
Frank Musick
Chief Cook and Bottle Washer
Allegheny Eastern Railroad


Monday, January 7, 2013

Roster Shots

So after spending time routing the helix panels, cleaning a gutter on the house and talking to my neighbor for a while I thought I'd goof off. For inspiration I decided to line up some of the current equipment and took pictures. You get the benefit (or anguish) of having to look at them. Most of the equipment is under construction. Almost everything needs to be repainted and lettered for the All East. I just want to give you an idea of where things are going.
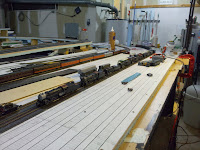
The Steam Fleet
Passenger Equipment
The passenger equipment started with five stainless cars and a set of heavyweights. We're now at two dozen. I stumble across good deals (like $30 for five cars) and buy them. They aren't necessarily any specific prototype with the exception of three lightweight observation cars. One of these is a PRR "squaretail" while another looks to be a NYC car painted in Illinois Central colors. The third could be from any road. The other cars are a mix of Burlington, PRR, IC and Southern Pacific paint schemes. The heavyweights are all tuscan except the Allegheny Eastern business car "Blue Heron" which is DGLE. Oh yeah...Buried in their somewhere is a Bachmann Gas-Electric. It doesn't look like anything the PRR would have owned. It's been "sold" to the Keystone Northern, the short line that connects to the All East at Llyswen.

Pictures of the steam fleet have already been posted so I'll skip them here. The steam roster includes three Mikado's. Two are Kato, one of which is converted to an L1s. There is a another GHQ L1s conversion kit for the second one. The third 2-8-2 is a Model Power or Atlas model. I could just paint it and call it an L2, but I think I'll use it to model another eight coupled locomotive. If I use my "spare" K4 boiler I could make another L1. Both loco's used the same boiler. That would put three "Mikes" on the roster.

 There are two Mini-Trix K4s engines. One needs tweaking. The other, the "spare", is a basket case, but the driver assembly is "sort of" intact. Then there's a Mini-Trix I1s "Hippo". There are some changes that need to be made to these particular Trix models to make them look right. I purchased it with most of these changes already done and MT couplers. There is a tiny Atlas Shay is being used for the Glen White Coal and Logging Company. This little railroad connects to the Allegheny Eastern just west of Kittanning Curve. The "big" engine on the steam roster is a Bachmann 4-8-4. It's being modified to resemble a Pennsy J1 and classified as an R2. The original R class, the R1, consisted of a single electric locomotive with the same wheel arrangement. Though I would love to have an actual model J1 this will have to do for now. Finally, there are two big Bachmann tenders to be rebuilt as Pennsy long distance types.

There is a lot more diesel than steam on the Allegheny Eastern, which is not quite correct for the period being modeled. The PRR had THOUSANDS of steamers. The K4 class alone counted over 400 locomotives. There were perhaps a bit over 800 diesels of all makes on the roster in 1949. Just as on the Pennsy at that time the All East diesels are lashed up in sets that count as one locomotive...
Class BF4, a Baldwin DR-4-4-15 A-B-B-A Set
Delivered to the PRR in 1949, the Baldwin DR-4-4-15 was the first generation of Baldwin "sharknose" freight engine. These 1500 HP units preceded the Baldwin RF16. These models are all ER RF16's, two of which are using V Line shells. All are to be "backdated" to resemble the original DR-4-4-15.
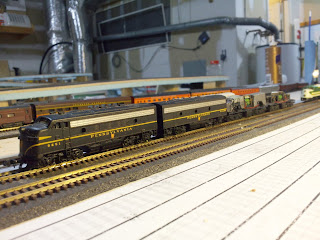
Class EF4, an EMD F7 A-B-B-A Set
The Electro Motive F-7's also came on the property in 1949. They supplemented a stable of EMD F-3s first purchased in 1947. The first two are Bachmann models with new gear/axle assemblies from North West Short Line. Standing in for the other two are Like Like Alco FA's. Pennsy FA's didn't appear until 1951 so these FA mechanisms will be cannibalized to re-power the Trix steamers. Two new F-7's will be purchased, but not from Bachmann. The 4 unit EMD brings up a question...In the older classification scheme how did they differentiate between F-3's and F-7's. Both were rated at 1500 HP and if they both run as A-B-B-A it seems they would both be classed as EF4. The same would apply to the E-units, but the E-7 and E-8 have different horsepower. Gives you an idea why the diesels had to be reclassified as single units.
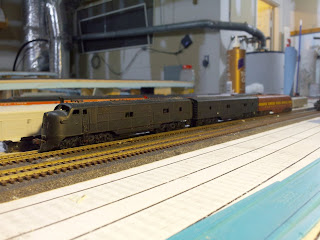
Class EP3, an EMD E7 A-B-A Set
Electro Motive E-7 passenger diesels were the first passenger units on the Pennsylvania. First purchased in 1946 they were followed in 1950 by the E-8, all A units. The model E-8A will be "kitbashed" with an E-7B body to become an E-7 (unless an E-7A shell comes to hand).

Class FF2, a Fairbanks-Morse "Eriebuilt" A-A Set
The FM Eriebuilts showed up in 1948. They supposedly came in two flavors, freight and passenger. My copy of the roster shows 12 of them, all classed as freight engines. The Allegheny Eastern uses them for the same thing. These units are based on old Con-Cor PA mechanisms with shells ala E-Bay.

Class AF2, an Alco DL109 A-A Set
The Pennsylvania Railroad never owned any Alco DL109's, but the Allegheny Eastern management was impressed with their performance on the New Haven and ordered a few during World War II. These units are long, measuring over 74 feet between coupler faces. I had thought to use the mechanisms as a basis for two 80 foot long Baldwin passenger sharks, and that may still happen, but I need a Baldwin B unit. Until then they are Alco's and still freight units.
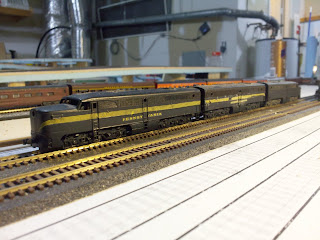
Class AP3, an Alco PA A-B-A Set
First purchased by the Pennsylvania in 1947 the Alco PA-1 was considered to be the "prettiest" diesels ever built. It's mechanical claim to fame was its single 2000 HP V-16 prime mover at a time when other builders were using two 1000 HP engines to get the same output. I wish I could blame somebody else for the decal job, but it's all mine. Hopefully the Allegheny Eastern version will look 100% better.
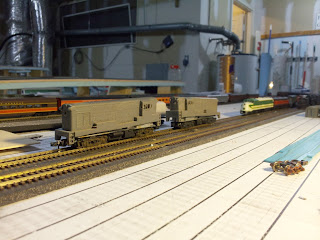
Two Class FS15, Fairbanks-Morse H-15-44 Switchers
I bought these H-15-44 road switchers.shell along with one of my V-Line sharks. Thought I might be able to use them. I forgot about them for the most part until recently. I already had a full set of sharks for the BF4 and still hadn't used the RS-3 mechanisms. It occurred to me that these FM shells might fit the RS-3 mechanisms. I tried fitting them and it almost works. There is a tab of metal of each side of the frame that needs to be ground off before they will sit properly.

Keystone Northern FM H12-44 and EMD SW-9
There are only two diesel switchers on the layout at this time. One is a Mini-Trix model of a Fairbanks Morse HH-12-44 which is has been modified to resemble an HH-10-44. It still needs North West Short Line wheel sets. This locomotive is the Keystone Northern's sole diesel. The other is an EMD demonstrator. Trouble is the demo is an SW9 that looks more like an SW8. Either way, it didn't exist until 1950. This is a fine running model and I hate to give it up. I'm thinking of leaving it as a demo and rationalizing that the demo would be working a year before the production models.

Class BP2, An A-A set of Baldwin DR-12-8-30 "Centipedes"
This set of Baldwin DR-12-8-30 "centipedes" is still an idea, but I have started collecting parts. The main "driver" trucks are from a Bachmann DD-40AX, which have the same spacing as the Baldwin. The leading and trailing trucks are from a Kato GG1, as are the sideframes for the drivers. The side frames will require several GG1 3 axle trucks to make the one 4 axle truck. The shell will have to be kitbashed also by chopping and sectioning several E-unit cabs and shells. The frame is brass channel.

Many of the ideas I'm sharing here were suggested by the guys over in the Railwire forum. They have offered ideas on the track plan and the trains, particularly for the Trix re-powers and the centipede. The forum has been a great deal of help in making the Allegheny Eastern a reality.

Sorry for the tangent. Back to construction of the third and final version of the helix (if it bombs this time I'm taking up golf). I have finished disassembling the old helix and "reclaiming" the code 80 track. Assembly of the new helix should happen over the next few days.

Regards,
Frank Musick
Chief Cook and Bottle Washer
Allegheny Eastern Railroad

Saturday, January 5, 2013

Construction Resumes

After the tests showed the layout flaws I had this idea of tearing up every inch of track and trying again. I caught myself before that happened. The code 55 section of the layout is actually in good shape and just needs tweaking. First step is completing the new helix. Progress stalled because the wood work really needs to be done outside. Routers also create tons of very fine sawdust as they chew through wood and throw it all over. Not a good idea in a closed garage. The twenty degree weather we've been having put a damper on working out of doors. Today the temperature is back up in the 40's so something got done.
New Helix Levels.

As I might have said early on, the channels I routed in the plywood are to make sure the track curves with no straight stretches and the resulting "sharp turns". Track will be laid on each section to form a sort of module. The sections of flex track will be soldered so that each level is one integral section. As I might have mentioned before the track must be connected and laid out straight when soldering the joints. This allows joints to line up correctly and permanently BEFORE curving the track. Had to read a few back issues in my library to learn that trick. Each level will have a set of feeder wires. The track joints between helix sections will be soldered as each level is installed. The overall construction is the same as the first attempts. There are 32 1/2" diameter posts supporting the structure. Each level is separated by 2" high spacers made of 1/2" PVC pipe. Those familiar with the original helix will note there is much more "meat" around most of the post holes. I also left the square corners on each panel. I will cut them at 45 degrees before laying the track. The transitions between the helix and the rest of the layout are built into the approaches at the bottom and top.

Just as in the helix I'm abandoning the idea of placing a feeder wire/rail joiner between each section of flex track on the layout (dumb idea 1,273,582). Instead I'm going to solder the track into 10' lengths with feeders at the middle of each length. I probably should go with 6' sections but why do it the conventional way when I can create more re- work for myself. I'm using thin silver solder meant for electronics. I have two sizes...VERY thin for decoder installs and just a bit thicker for rail work.

Few, if any, turnouts will be used on the mainline at this time. The few Atlas turnouts I have will be used on the short line, now called the Keystone Northern, and at the interchange and carbarn on the Logan Valley trolley line. I'm going to attempt building all the mainline turnouts in place. Many of them will have to be curved to suit the track radius and they aren't commercially available. Most of the curved pieces are in the yard. I tried to use ladders with #7 turnouts but that wasted a ton of real estate. There are also a few curved turnouts on the main, especially around the helper loop at Tunnel Hill. The interlockings at KEY and BLAIR will require some long crossovers (#10 or so) but these are all dead straight. Wish me luck on that project.

In other news...
Another K4s arrived today in the mail. I used the gift card I got at Christmas and bought it on E-Bay. Gift cards have become my standard request every year. That way I don't have to return the new AC6000 somebody might give me.

Anyway...The engine needs a slight repair, but I purchased it that way. The pilot truck is missing two wheels on one side. I have another from a "spare" K4 I managed to destroy while reducing the flanges. There was also that abortive attempt to re-power the thing. Helps if you read up on the procedure before you actually perform it. A life lesson learned...
K4s Sans Pilot Truck

It also seems to have a "hitch in its git along". I'm thinking the driver assembly was pulled out of the frame for some reason. If they are not replaced in EXACTLY the right way the engine will not run as smooth as it did from the factory. I have two Life-Like motors available so I may also re-power this engine and the I1s that arrived at Christmas.

I'll keep you posted.

Regards,
Frank Musick
Chief Cook and Bottle Washer
Allegheny Eastern Railroad


Friday, January 4, 2013

The Roster

I've been looking over the locomotive rosters for the Pennsylvania Railroad. Because of the time setting for the Allegheny Eastern, I used 1949 as a cut off date. This gives me a bit of leeway in choosing equipment to run on the layout. It also puts a ceiling on my freelance choices helping me to stay within budget and create a more realistic model. I don't have to set limits for myself. I could just run whatever appeals to me. That would result in things like the GM Aerotrain running alongside Union Pacific's M10000 and Burlington's Pioneer Zephyr. I think eventually it would look more like a collection than a real railroad.
1955-56 GM Aerotrain

Even within the confines of the Pennsy's own history there are choices I could make that I feel would detract from the impression I want to create. I could, for instance, run S or Q or N class steamers. 
PRR Class Q1

The Q2 especially is one of my favorite locomotives. Fortunately, at least in this context, the only examples in N scale are too expensive for my tastes and wallet. A better reason, however, is that these three classes of locomotive belong to the Lines West part of the PRR. They are more at home flying across the gentle hills and plains of Ohio and Indiana where they can stretch their legs at 100 mph plus. They weren't built for the tight curves through  the Alleghenies.

Likewise I could try to get my hands on one of those Y-3 articulateds the PRR got from the Norfolk & Western. They were classified HH2. Once again, these locomotives were never used to climb the grades to Gallitzin. For the most part they were used around Columbus, Ohio for hump service and other duties. They were gone from the Pennsy by 1947. Besides these engines and the HH1 the PRR avoided articulated steam like a plague.
PRR Class HH2

This isn't a bad thing. I still have a huge selection of PRR steam to choose from. Horseshoe Curve saw  literally hundreds of just about every other class on the Pennsy roster. The only limitations to the selection besides the engines already listed is locomotives that were scrapped long before the 1940's. Units like the class A switchers and class F Moguls never made it to that era. Many of the other classes were still represented, even if most of them were decades old.

Diesels are a whole 'nother story. If I stop at 1948 I can choose F-3, E-7 and Eriebuilt cab units. The Baldwin passenger sharks came on the property in that year. The centipedes arrived in 1947. FM H-10-44's and GE 44 ton switchers were working as well as a host of Baldwin and Alco hood units. The Alco RS-3 and Baldwin sharknose freight units were still in the future.

If I fudge a bit and move up to 1949 the first generation of Baldwin freight sharks appear. GM F-7's show up and so do FM H20-44's. Those RS-3's, of which I have several, don't exist yet. No matter, they can be sacrificed to provide mechanisms for the shark shells on my workbench. If my information is correct the two or three Alco FA cab units I have can also become Baldwin sharks.

The fact that the Allegheny Eastern is freelanced means I can also supplement actual Pennsylvania locomotive classes with other engines the All East management might consider. If they decided, for instance, that the 4-8-4 was worth investing in, they might have ordered a few and classified them as R2. These locomotives might look very similar to the Class J 2-10-4 and not, as might be supposed, the sharknose T1. The management might also purchase a few Alco DL109's and use them in freight service. It worked for the New Haven.
Allegheny Eastern Class R2
Since PRR steam is not readily available in N scale (other than Trix and brass) this offers some flexibility and keeps the operating budget in the black.

You might say, "If you can run anything you want, why all the worry about when it ran?". Continuity might be the answer. I avoid equipment that wasn't in service at the end of the 1940's. The freelance choices still fall within the time period. The R2 4-8-4 was a viable choice in the same period. The All East management is a bit more flexible and willing to accept proven designs used on other railroads. The 4-8-4 offers simplicity and can be produced and maintained at a more reasonable cost. While it may not be capable of speeds that match the T1, it spends less time in the shop. In reality that "reasonable cost" mentioned is quite literal. I can find a Bachmann Northern that fits my budget. It's easy to modify one or two to resemble the J1. A T1 has to be brass or kitbashed from several other models. Both alternatives are expensive.

For the most part steam is not really a problem in modeling the late '40s. The last generation of steam locomotives were built during World War II. Altoona's last product was in June of 1946. There wouldn't be any newer steamers in 1949. New diesels, on the other hand, were flowing out of Alco, Baldwin, EMD and other manufacturers. I can use most of the first generation of diesels so almost all the varieties are represented. I just leave out the ones that other modelers of the transition period are using. Lot of folks out there modeling the mid 50's. I wanted something just a little different.
So much for motive power. What about all the rolling stock? I'm working on that...

Regards,
Frank Musick
Chief Cook and Bottle Washer


Allegheny Eastern Railroad