Wednesday, December 9, 2015

The Hump

Bridges, bridges bridges. They're fun to build, especially when you're not following any prototype whatsoever. They do, however, consume mass quantities of stripwood. The guys at the local Hobby Town now know be my first name.

I won't go into detail on how I built them. Suffice to say you create a template and construct the trusses, bents, whatever on top of it. I've been using superglue gel to hold things together; much faster than wood glue. I've also started using Testors "burnt umber" paint instead of stain, painting after the bridges are assembled. In the case of the Shenaminy Creek trestle it took hours to paint. All those nooks and crannies. I installed it and you know I just had to stage some photos...
Twin Hustlers and Ore Train, Gas Electric Cross Shenaminy Creek


The Bridges at Quotidian

There's a second Travis Hustler now. This one took a bit of tweaking. I purposely built it lower, hoping to get it low enough to fit the actual Hustler shell. The size of the pulley cancels that idea. I ended up adding a spacer to make it taller. After I got it running I took some video...
Travis Drive Hustlers

I need boxcab shells for the Hustlers, something that resembles the "oil electic" diesels produced in the 1930's. I could kitbash a few of the Athearn shells. I could also try again to find a Cary shell, but I'm trying to build them from scratch. I've taken several shots at it, but I'm not satisfied with the results so far. Window openings are unsquare. parts don't fit nicely, just general poor appearance. Practice, practice practice...
"Travis" Boxcab Shell


Starting on some of the scenery. Using scraps of foam I'm slowly building the terrain. A big part of the process will be the town itself. I'm building it on a workbench. The entire town will be on a piece of 2" foam I can drop into place.  I tried laying the town out on paper but couldn't get the "feel" of it. Ended up but creating a paper template of the area available and laying it out with real buildings, mock-ups and track. The viaduct is virtually finished and the overall appearance of Quotidian has changed a bit...
Engine Terminal and ACME Manufacturing

"Skyline" of Quotidian

Trackside

I completed the branch somewhat. Had to realign one curve that was so tight the Hustlers derailed. I also had to smooth out the grade between Shenaminy Creek and the Split River. This area is now called "the hump"...
Realigned Curve Before Viaduct
Shims to Ease Grade at "The Hump"


Trackage is complete enough to actually run a train. The train is short, only four cars and a caboose. Good thing too. In spite of the reduced grade and an additional 2 ounces added to the weight of each locomotive it still requires both boxcabs to conquer the hump...
First Q Co. Train

Regards,
Frank Musick

Tuesday, December 1, 2015

A Mystery, Masonary and a Herd of Hustlers

Found this image in an old Railroad Magazine dated May, 1949. Upon first sight it looks like Rube Goldberg's version of a self-propelled railcar. Very "steampunk" to be sure. I suspect it could be a product of a fertile imagination, but knowing the whimsy of railroad design before the Civil War it could well be a rendering of a real piece of equipment...
The "Colorado"


Many of railroadings pioneers seem to have let their imaginations run wild while designing equipment. The single set of tall drivers shown on the "Colorado" also appeared on British "Cramptons" and the Camden & Amboy's "John Stevens". One of several 6-2-0 locomotives designed by Isaac Dripps and built between 1849 and 1853. If I recall correctly, those drivers were nearly 8 to 9 feet in diameter. They tended to slip getting underway but could zoom along at a pretty good clip. The solid panels between the driver spokes are not ornamental; the big wheels worked like giant fans at speed, spraying debris and dust along the right of way. Closing off the wheels eliminated this curious behavior. After several year of service the engines were rebuilt as 4-4-0's...
Camden & Amboy "John Stevens"

Like I said, it's not unlikely that something like the "Colorado" could have been real. Since the tin-type may be the only evidence of it's existence we'll never know.

Meanwhile back in the present...

I started "detailing" the Quotidian viaduct. I took that embossed stone paper I purchased a while back and traced the viaduct on the back...
Tracing The Viaduct

Then I took a triangle, lined it up square with the paper and drew over the traced lines so the they were 90 degrees from horizontal...
Squaring the Tracing
Using a #11 hobby blade and the triangle, I cut along the center line of each arch. I also made a perpendicular cut 17 scale feet from the bottom of the paper. The paper within the arch got cuts every 45 degrees...
Square Cuts

The vertical cuts were on the arch centerline only. This let me fold the paper in at each arch for the lining of the masonary...
Finished Cuts

I spread some glue on the viaduct side and smoothed the paper using a plastic painters tool like a squeegee...
Tacky Glue
Smoothing Paper and Painters Tool


Then I folded the paper inside the arches to simulate the stone lining. The curved part of the arch was also folded in. The 45 degree cuts allow the paper to conform to the curve...
Lining Arches

Once I got all the paper on the sides I added more paper on the verticle sides of the arch and lined the arch itself. Unfortunately, I forgot to take pictures of those steps. The almost finished product looks like this...
Stone Viaduct

Still needs the keystone and such at the tops of the arches. I ran out of stone paper so the other section of viaduct may be done in one of the other papers. Not sure which...
Embossed Papers

Right now I'm fooling around with a trestle that carries the second loop of the branch over Shenaminy Creek...
Shenaminy Creek Trestle

A few more EBay purchases came in yesterday, including two Hustler mechanisms. One will replace the twins unit I "borrowed". The other will receive a Travis drive and boxcab shell. Several ore cars full of andyrobertssite or coal can get pretty heavy. It will often be necessary to double head the boxcabs on the branch.
A Herd of Hustlers


Regards,
Frank Musick

Saturday, November 28, 2015

Shenaminy Creek and the Split River

The mainline and the branch cross over two watercourses. In Quotidian the Shenaminy Creek passes through a culvert and under three bridges The first bridge is a low wood trestle carrying the branch tracks. The second bridge is a plate girder bridge supporting the mainline. The third bridge is a tall wooden trestle carrying the branch tracks over the creek a second time. The two lower bridges are followed by tunnels while the high trestle leads to deep cut through the summit of the mountain...
Girder Plate Bridge Over Shenaminy Creek


The mainline plate girder is the only bridge installed so far. The other two, the trestles, are under construction at the workbench.

I decided that all the bridges on the branch should be constructed of wood. Over the Split River I decided to uses this freelanced design of a Howe truss...
Howe Truss

Building the Howe caused me to modify the other wooden bridges on the layout. The trusses built before the Howe were faked up using only a single thickness of wood...
Howe Versus Earlier Truss

The Howe, though still not "correct" looks a lot more substantial than the trusses created previously. I made a point to go back and make all the earlier bridges look better. I did this by adding more lumber to the top and bottom and stringing piano wire that mimicked the new truss...
Viaduct Modified Truss


I stained the bridges after assembly with "provincial" furniture stain. The stain, however, could not cover any glue spots. I had to mix a "creosote" shade of brown and black flat enamel to paint those areas. I also tried pre-staining, but found that CA glue wasn't sticking properly. Painting after assembly seems the best approach.

Anyway...I assembled the Split River bridges and installed them. The Warren carries the mainline. The branch crosses over the river on the other two...
Split River Bridges

It looks like this may turn out to be a great spot for photo's. The bluffs on either side of the river are very steep, almost vertical in the higher elevations. The river itself is still a wild mountain stream of falls and rapids...
Split River, High Angle

Now it's time to get back to Quotidian. The viaduct needs painting and stonework, the town needs to be layed out.

Regards,
Frank Musick


Innovations

Laying out the viaduct it became obvious that the branch right of way needed realignment. While this could have been avoided with "proper planning" I don't work that way. Despite all the fuss about it from some modelers I don't mind doing it twice (or more). If the end result is what I can live with it was worth the extra effort.

Fortunately, the styrofoam spline I use for road bed is very forgiving. You can realign it very easily. It gives to a certain extent. A curve can be formed to a tighter or wider radius just by screwing the spline in the desired position. I chose not to do that, however, and created a new section of spline instead. I added a few "innovations" to the new construction.

The roadbed can be cut with a razor, exacto knife etc, but I chose a Zona saw, what I call the "short sword". It's a keyhole saw of sorts, with a very pointy end that's great for pushing through the foam when need be.

First I cut out the section I didn't want anymore. I lifted the whole thing off the layout and set it aside...
Removed Spline

You can see that, once the glue dries, it's easy to remove large sections. The spline also maintains its shape, very convenient in case you want to use it somewhere else. I'm not reusing this piece. Instead I'm laying new spline.

The first step is to cut more spline strips. I use my trusty straight-edge, originally meant to cut drywall. It came in two four foot sections. I modified mine so it is permenently eight feet log. It has a stop along its length made of channel set to cut 2" strips. The cutting side is square to the foam...
Straight-edge

I simply lay it over the 4' x 8' by 1/2" foam and run a razor blade along it. In the past this has worked, but the cut was not always square, so the spline top wasn't level width wise. Most of the issue was caused by me, cutting too fast to be accurate. This time around I went slower, cutting in several passes and pressing the utility blade hard against the straight-edge to ensure the cut is square...
Slow Versus Fast Cut

Once the strips are cut I start building the spline itself. First I notch the existing spline so it overlaps the center strip...
Notched Spline

The notch creates a stronger joint and centers the new section. I coat the joint with glue and drive in some drywall screws to act as clamps. Most of the time these screws are left in place to help hold the spline together...
Splicing Splines

In the past I've created the entire spline at benchwork level and then elevated it. This works well, but this go around I decided that all I really need to construct is the center strip. I elevated the strip starting at the known height of the viaduct at Quotidian. I used other existing supports as height guides. Rather than using stacks of leftover foam I created notched pylons. The pylons support the strip, the notches keep it centered....
Old Supports, New Pylons

I made the pylons all the same size, necessitating a second piece to raise the spline to the proper height. All the new supports are two piece, rather the hodge-podge stacks of various thickness foam. Thinking back on it the pylons should be fashioned from one piece of foam cut to the correct height.

Once the center strip and pylons were located and glued in place I started on the outer strips. With all the earlier splines all the strips were continuous. In this new construction the outer strips only run between pylons. Once again I use a combination of glue and screw to hold the strips in place...
New Spline

In areas where I thought I might need to change the curve radius I also installed "outriggers". This is just another spline strip running on either side of the supports.

There are several places on the branch that required special handling. The first is where the branch crosses over the mainline inside the mountain. There is not enough room to fit a standard pylon. I had to create a "bridge" to support the roadbed. I used a section of plywood mounted to the lower supports...
Roadbed "Bridge"

The other location is where the branch and the mainline pass under the mine. This is another mountain with tunnels for the mainline and the branch. I placed my NMRA clearance guage to see what needed to be removed....
Clearance In Mine Area

Rather than mess about with modifying the existing roadbed I simply removed and replaced it with a large section of plywood supported on substantial foam blocks...
Plywood Mine Support

The one place I found the most troublesome was the corner at the far end of the viaduct. The track gets VERY close to the layout edge. I filled in the entire corner so I could create a tight curve with a nice transition...
Filled Corner
With the spline complete I have to make places to add all the bridges I'm building. This will require some more cutting and trimming.

Regards
Frank Musick

Thursday, November 19, 2015

Bridgebuilder?

There's an old off color joke that starts "You can build a million bridges and never be called a bridge builder". I'm about 999,995 bridges or so short, so I needn't worry. Besides, I've probably been called worse than the punchline numerous times.

Please note that I made no attempt to follow any prototype on any of the bridges. If it roughly resembles a bridge, that's close eough. I tried making things prototypical on the N scale layout. I got so caught up in the "realism" I couldn't make a whole lot of progress. Trackage and some minimal scernery was as far as I got.

The fun quotient went south. I had this mammoth project in my garage but I really wasn't satisfied with the results.

Anyway...

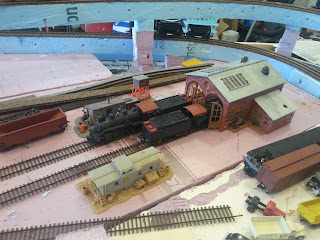
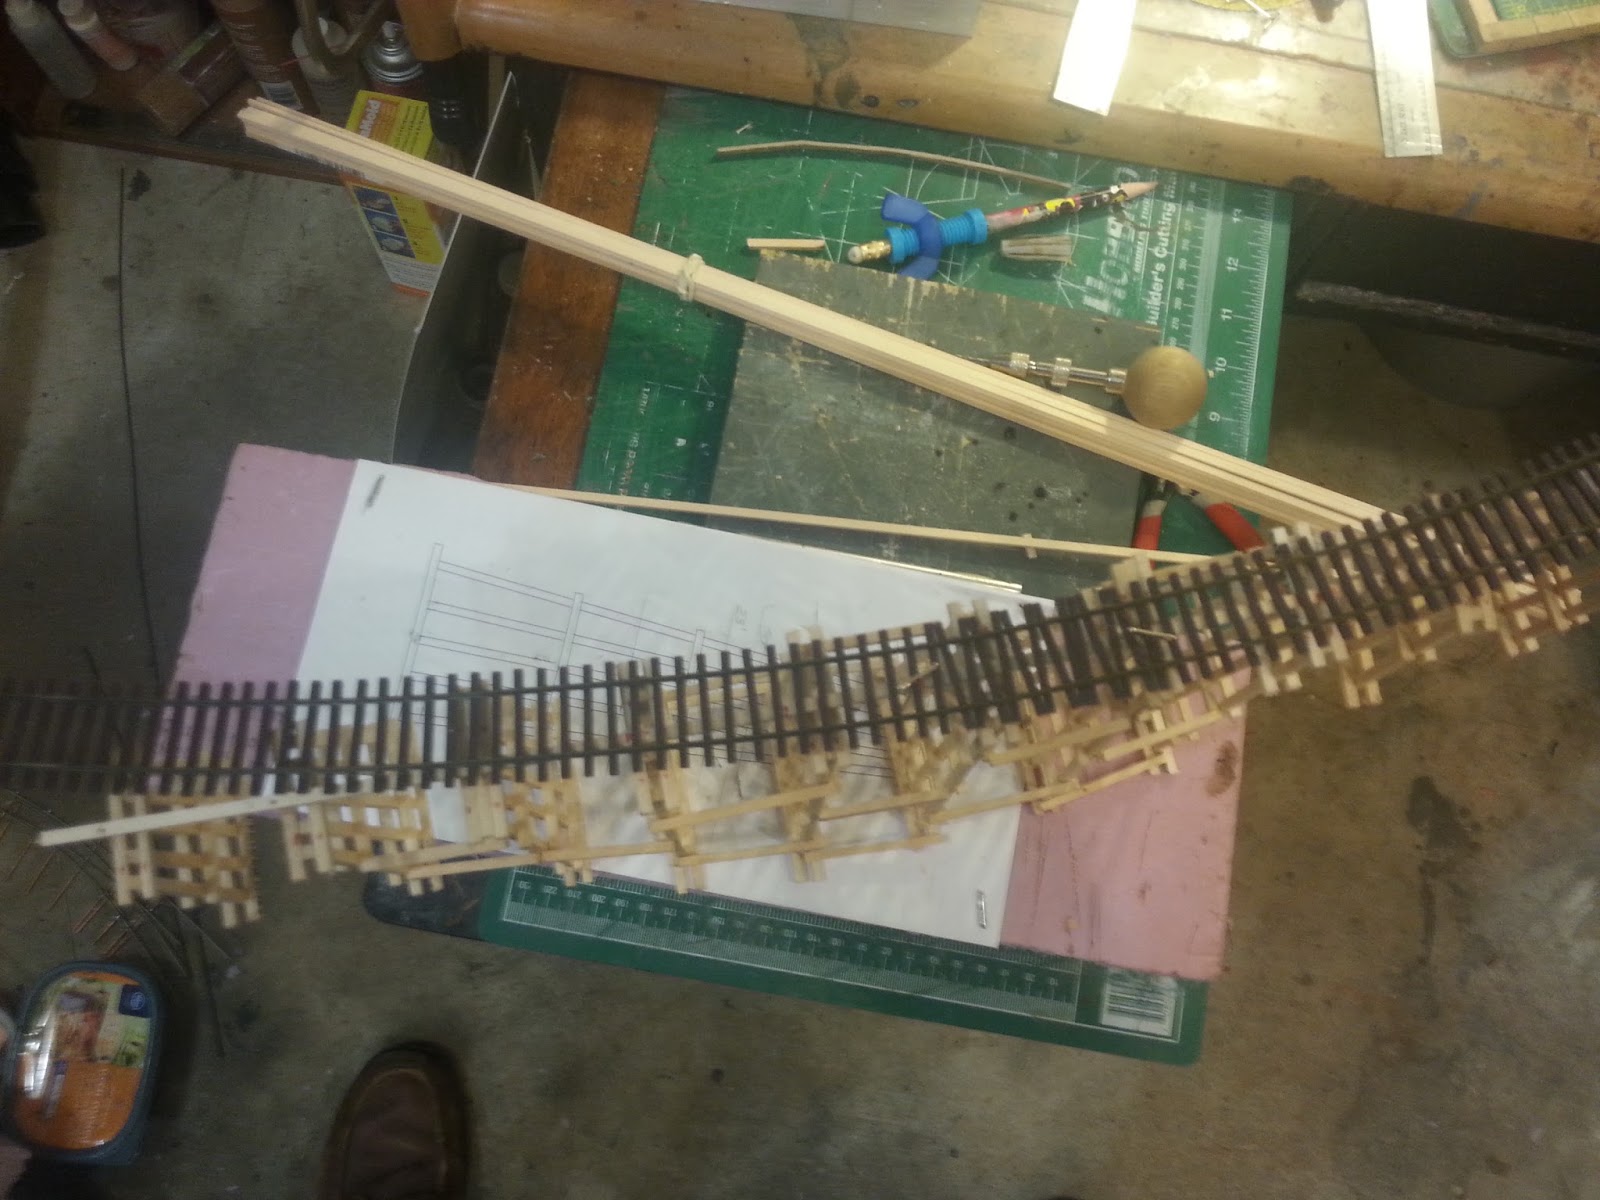
I built a set of truss bridges for Quotidian. There are three of them connecting the viaduct sections and carrying the branch over the Main, passing siding and yard throat (if you can call it that)...
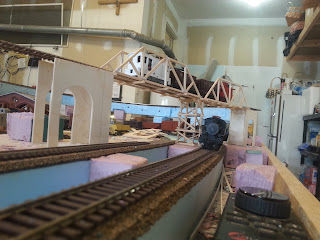
Quotidian Bridges

The third truss bridge will be installed behind the camera location.

The truss bridges being straight I cut the viaduct into sections after realizing they need to be curved. Each arch is a section on both parts of the viaduct. Luckily the styrofoam spline makes it easy to make changes.  The track on both ends of the viaduct will require new alignments. The curve radius will undoubtedly shrink. Fortunately the equipment that will operate on the branch can handle tight curves..

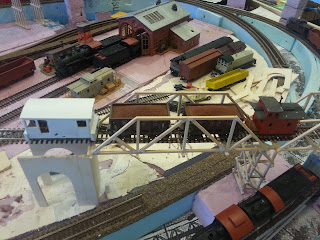
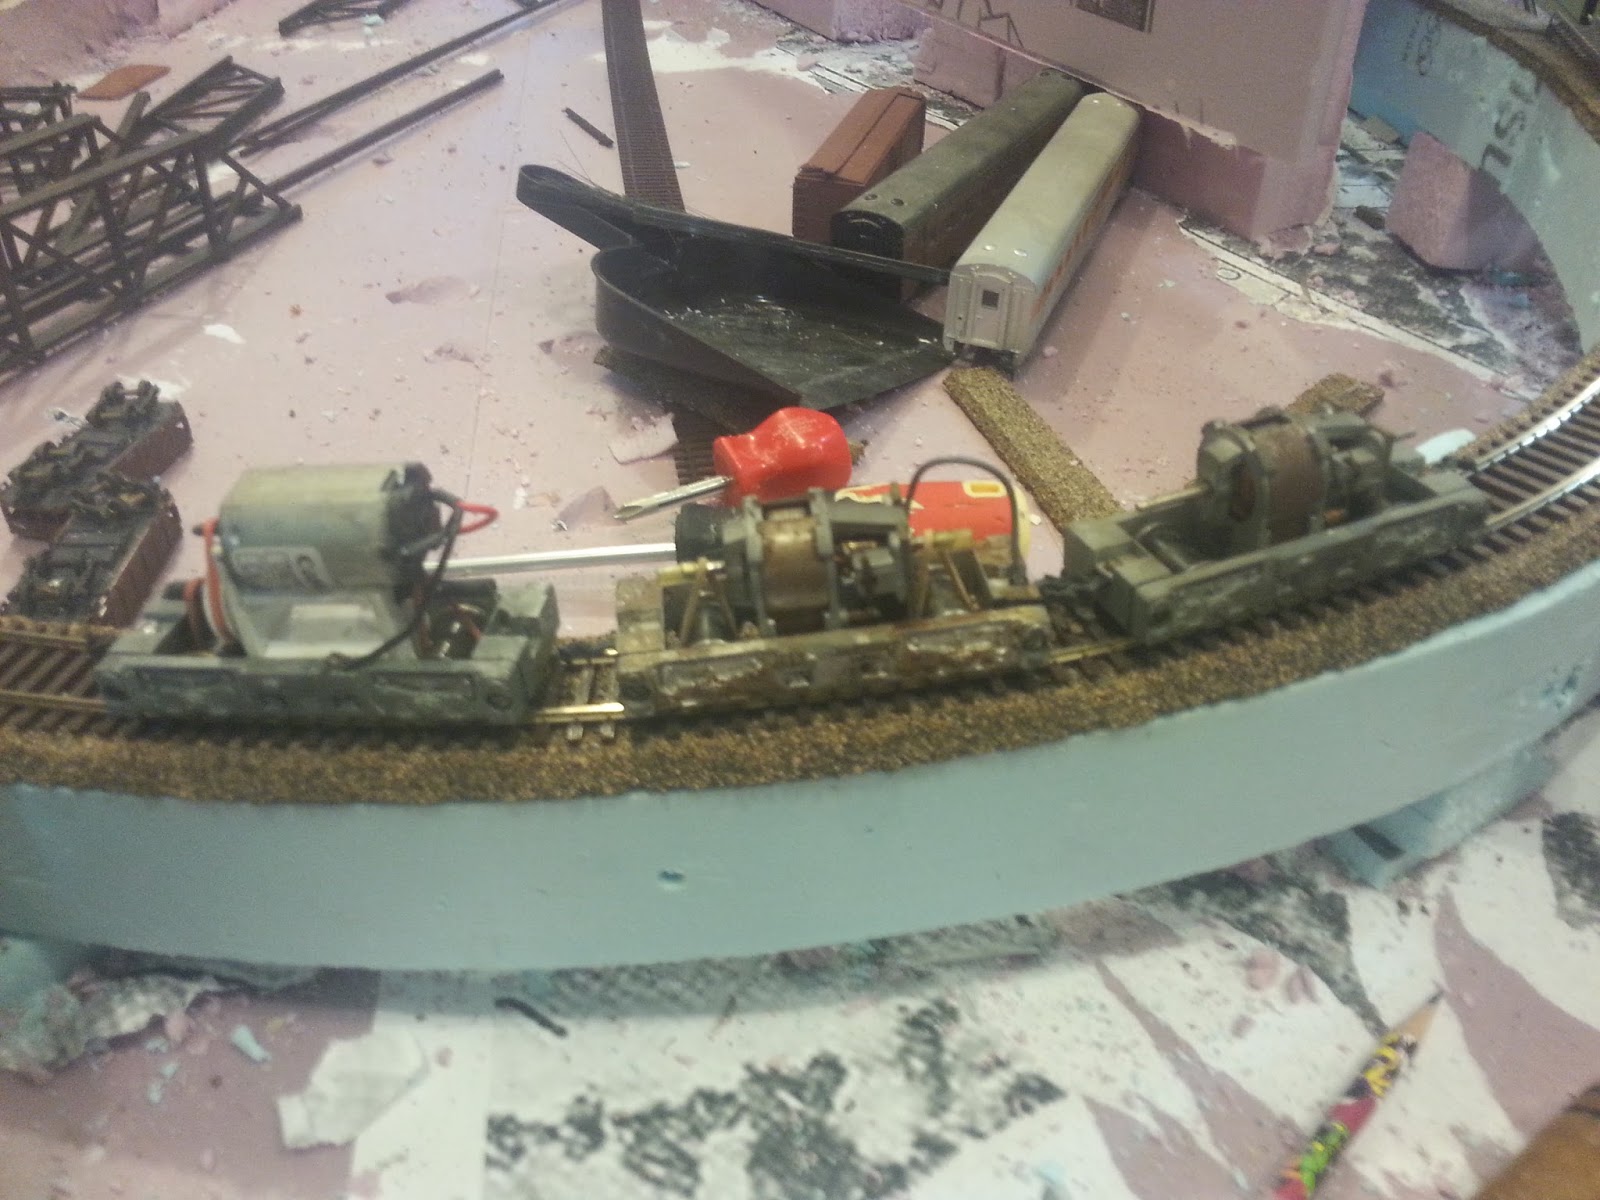
Meanwhile at the opposite side of the layout all the track loops cross the Split River. Where the branch approaches the mine I decided to at a trestle and truss. If the truss looks familiar it's because it's the Web truss, the first bridge I built. Rather than use it at Quotidian, I turned it upside down and combined it with trestle bents.

Split River "Canyon"

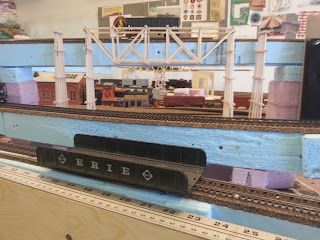
The trestle bents are all the same size. The canyon has vertical walls. To the left the tracks will emerge from a tunnel. To the right they'll pass through a deep cut to the mine. I'm not really sure yet what bridges will carry the other tracks. The Erie girder will be used on the other side of the layout.

I mentioned above that the equipment operating on the branch can handle tight curves. A typical andyrobertsite train looks something like this...
Short Equipment on Tight Curves

Since I first saw the Gorre & Dephetid I have wanted a train of these short ore cars. Same with those little disconnected log trucks. The ore cars were easy to find at prices to suit the budget. Those log cars, however, cost a bit more than I wanna pay. I have a similar truck from a industrial / logging caboose. Maybe I can scratch up a set by copying that.

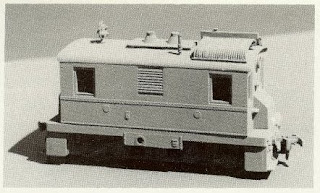
As for scratch building, I'm taking a shot at a shell for the Travis drive Hustler. It needs some sanding, a riveted wrapper and a few other things, but I got the basic shape...
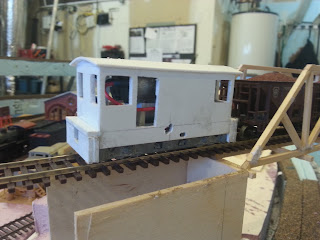
Travis Drive Boxcab

I had to laugh at myself. I built the ends with the shell sitting on the frame. I patiently cut out coupler pockets based on the Kadee coupler at the rear of the engine. I did not, however, pay attention to the fact that I was painting myself into a corner. The shell cannot be taken off without removing the couplers. Nor can the couplers be removed until the shell is out of the way.

Oooops

In case the homebuilt boxcab doesn't work out, I'm looking for an old Cary Hustler shell. It was cast from white metal and designed to fit the wee beastie...
Cary Boxcab Shell


Some serendipity to compensate for painting myself into that corner came from EBay. I had shown you the Revell enginehouse I snagged cheap. I also came across two more affordable Revell buildings...
Revell Buildings

A sandhouse and a yard office as a set. Couldn't resist. I love theses old Revell kits. The buildings have resurfaced under a series of manufacturers, some in Europe, some here in the US. I stick with the Revell.

They say that most, if not all model railroaders are trying to recapture memories from their youth. I've come to realize I'm the same way. I building this layout based on the model railroading I saw as a kid. The penchant for Revell building kits, the obsession with old MR and RMC magazines (pre 1970 or so) and several other aspects of my hobby all come from being nine years old. My first exposure to model railroading (that I can remember) was a huge pile of Model Railroader magazines my brother-in-law had. I would sit with halh the pile in my lap and spend a few hours paging though. I would alternate pile halves and bring them home. The bug really bit when I came across an image of Robison Cliff on John Allen's Gorre & Dephetid. Way back then I tried scratchbuilding trying to copy things I saw in those magazines.

Like many model railroaders I took a hiatus from the hobby to study girls, cars and more of either. There were some minor skirmishes throughout the years, but it wasn't until I got somewhere on the younger side of sixty that the hobby caught up with me. I learned about "digital" model railroading with Microsoft Train Simulator. I tried operations, but found I had more fun building virtual models for the simulator...
Virtual New Haven ALCo's

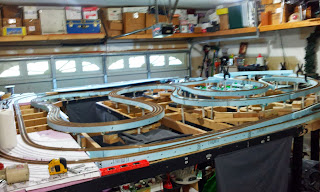
Sometime in there I underwent a quadruple bypass. Upon recovery I toyed with building S scale models as therapy. Soon a portion of the garage was taken over and an N scale layout began taking shape until it enventually took up most of the garage...
Allegheny Eastern  Slope, Pennsylvania Railroad

So that's how I ended up here. Sorry about the history tour.

Regards,
Frank Musick

Friday, November 13, 2015

Slow as Molasses in February

Still working on the bridges through Quotidian. Two are almost done with a third waiting for assembly...
Quotidian Bridges

I went with a more realistic design (you can see the original "Web" bridge at center right) for the three bridges. The two are shown here will soon be carrying the branch across the siding and mainline. The third will be located at the other end of the viaduct. I'm thinking I may have to reallign the roadbed to make them all fit.

Did some speed tests on the two diesels I've been tinkering with. I mentioned previously that I had purchased two Canon motors. The first went into the Hustler. I decided to use the second one in the SW1. I made some videos of the tests. First the SW1 (please excuse the noise)...
SW1 Slow Speed Test

The locomotive ran pretty well with the stock motor after I eliminated the traction tires. The new motor enhansed the performance even more. I think I clocked the engine at just under 9 mph.

The Hustler is a whole 'nother story. Between the new motor and the Travis drive performance is unbelievable. In this video the locomotive is running the 3 foot section of mainline along the rear side of the layout. The video is in real time...
Hustler Slow Speed Test

It now takes over a minute for the little locomotive to travel 36"  Using a scale speed converter on the web I found that's the equivalent of 2.3 mph. Light years beyond the performance of the stock Hustler. The Travis drive is almost silent, which in a way helped me test a turnout. The only time I can hear the locomotive is when it traverses the turnout. It makes a double clunk sound as it passes through the frog. The turnout is slated for replacement. I'm getting better and fabricating them.

Regards,
Frank Musick

Tuesday, November 10, 2015

Widgets and Doodlebugs

Still multi-tasking. One of many advantages of retirement is being able to spend as much time as I want on things you want to do. Very few, if any, people have a monopoly on my time. You can get a lot done on a model railroad when you have 8 or so hours a day to spend on it.

Anyway...The Canon motors arrived. Right away I had to play around with one. I had to modify the widget to suit the motor, but not too much. The performance was quite a change. So much so that I did some other tweaks on the Hustler chassis. Made sure the pulley was square to the shaft, that sort of thing....
Canon Powered "Widget"

How much of an improvement was this new motor? See for yourself...
Travis Drive Hustler 


It runs slow enough. It can run even slower than shown in the video. That's great, but can it work for a living?
Here's the little guy pushing a string of ore cars...
Hustler at Work


Still working on the boxcab shell for the wee beastie. When it's done it will be assigned to hauling ore cars back and forth on the branch.

In other news, Quotidian now has passenger service...
Gas Electric

I got this Bachmann doodlebug off EBay at a reasonable price. It was pretty noisy when it first ran, but settled down after a few loops around the layout. Lighting could be better, it tends to flicker. Themajor problem with it is the beautiful Baltimore & Ohio paint job. I don't want to repaint it. Fortunately, the B&O is one of the railroads I like to model.

Another video, this one of the gas electric...
Baltimore & Ohio Gas Electric


The quality of these videos sucks. I've used my phone to take previous videos with good results. Not so good on these.

Now that the glue has dried on the trusses i can actually build the bridge. Staged it with the camelback...
Web Truss Bridge

Apparently the freelance design of the truss actually works. If not then the only thing holding up the locomotive are two 1/8" x 1/8" basswood stringers...
Tight Fit

If you've been reading this and you remember the basic idea of the layout, Quotidian was a small town with a couple of industries. I hadn't really planned on modeling any real engine facities. Then I found this beauty on EBay...
Revell Engine House

Needs a bit of work, but it was cheap and best of all it's one of those Revell models from back in the day. I've always liked the buildings in the series, with the possible exception of the water tank. Back on the day I would have loved to have a few of these on my layout. They are well detailed and look great. A lot of modelers use them in kitbashes, but this one won't. I gonna make the missing parts, paint it an weather it. Hopefully one day this scene will be a respectable vignette...
Steamers and a Brick Enginehouse


Regards,
Frank Musick